

Trolley To Checkout
Click and Collect Order Flow
Checkout flow for store collection type orders from PLP and PDP
Overview
This document explains the entire flow of a store "click and collect" order in ToolStation Website and the technical strategy involved.
Channel Overview:
- API identifies it as
channel = 2 - Usually can be collected from the store on the same day of order placement
- There are products that are only available for collection and
not for any other channel determined by flag
click_and_collectfrom products response - Two conditions should be met for pickup to be enabled
- branch must be set by the user
- Selected quantity must be within limit of the stock available at that branch
Note: Some branches may not support click and collect due to temporary unavailability. On frontend they are visible to the user but user can not select them for pickup. Determined by
click_and_collectflag in branch details response.
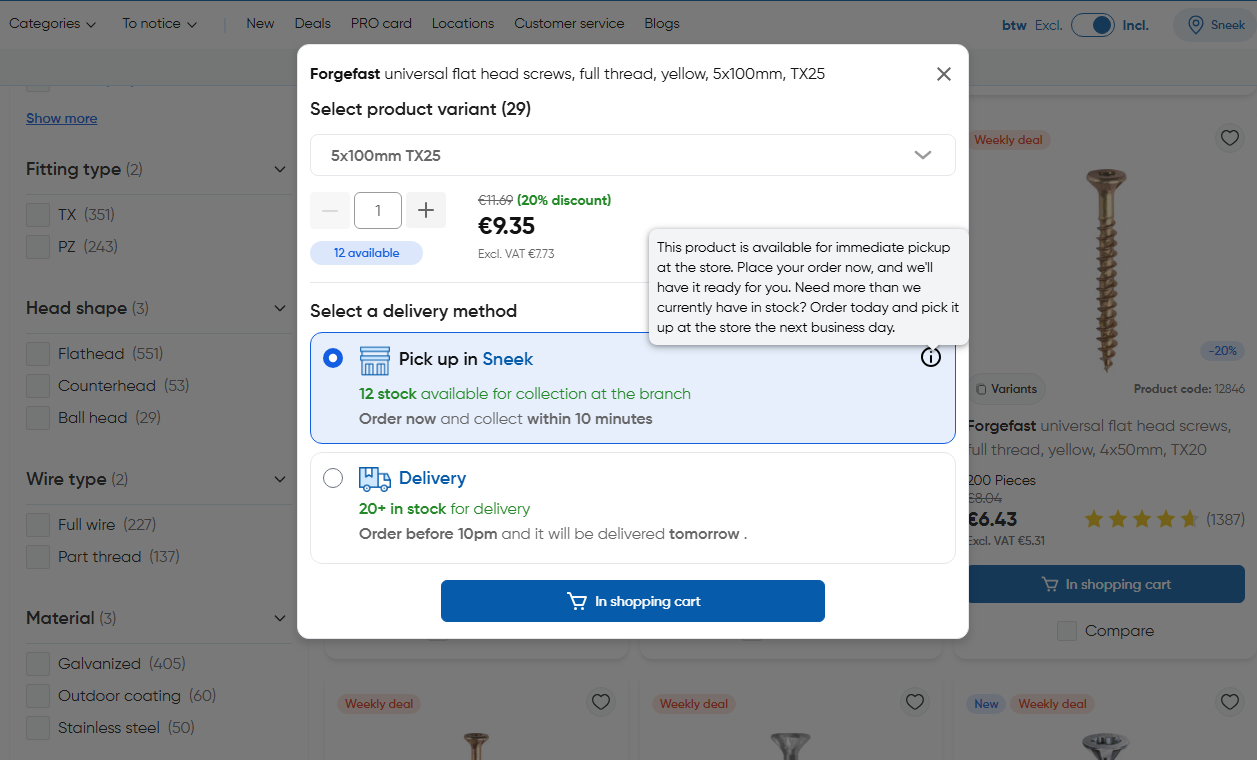
PLP
- On add to trolley modal, store pickup is the first option. If branch is not set, the modal prompts the user to select a branch as the first option.
- Pickup stock is fetched from the POST
/stock/getStocksAPI by passing the selectedbranch_idand is injected into theproductobject - Accessed from
product.stockDetails.collection(number) - Increasing quantity beyond available stock can have two consequences
- If the quantity is less than the delivery stock, View is changed to "Next Business Day Collection"
- If the quantity exceeds the maximum of delivery and collection stock, Add to trolley button is disabled or a "Notify Me" button
is displayed at the very place based on
product.allow_stock_notifications
- View Stock in other branches: This option opens a popup listing all branches with their respective stock levels for that item
Preview
When user adds an item for click and collect, following method is called and
the product is added to trolley in collection channel with the selected quantity:
// ~/components/organisms/TsProductActions.vue
async function handleAddToTrolleyAction() {
  if (
    trolleyStore.previewed_product_selected_channel ===
    TrolleyChannel.Collection
  ) {
    await trolleyStore.addToTrolleyForCollection(
      trolleyStore.previewed_product.code, // product_code
      trolleyStore.previewed_product_selected_quantity // quantity
    );
  }
}

// ~/stores/trolley.store.ts
async function addToTrolleyForCollection(code: string, quantity: number) {
  // Set default params for collection
  await dispatchItemToTrolley(
    code,
    quantity,
    TrolleyChannel.Collection, // 2
    DeliveryMethodCodes.Collection
  );
}
Refer this doc for trolley dispatch core
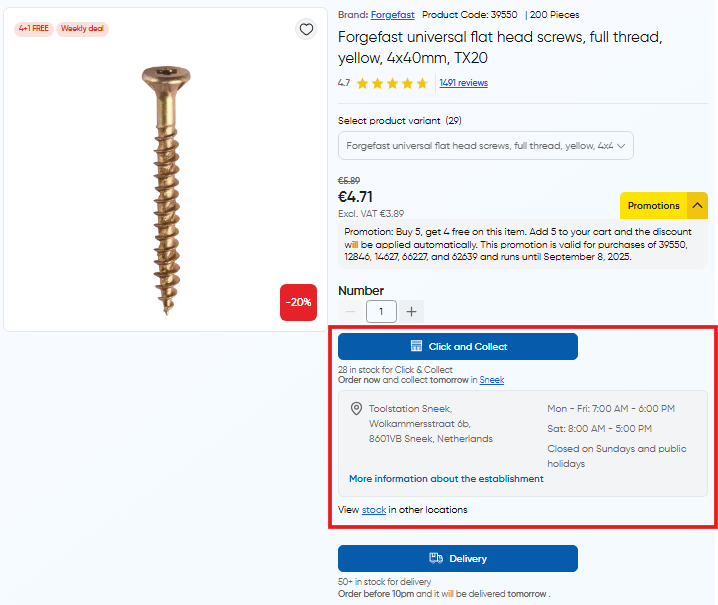
PDP
- In product details page, click and collect option has an expanded view which displays further information about the branch (e.g address and opening hours)
- Clicking on more information, redirects the user to the branch details page
- Here also there's an option to view stock in other branches
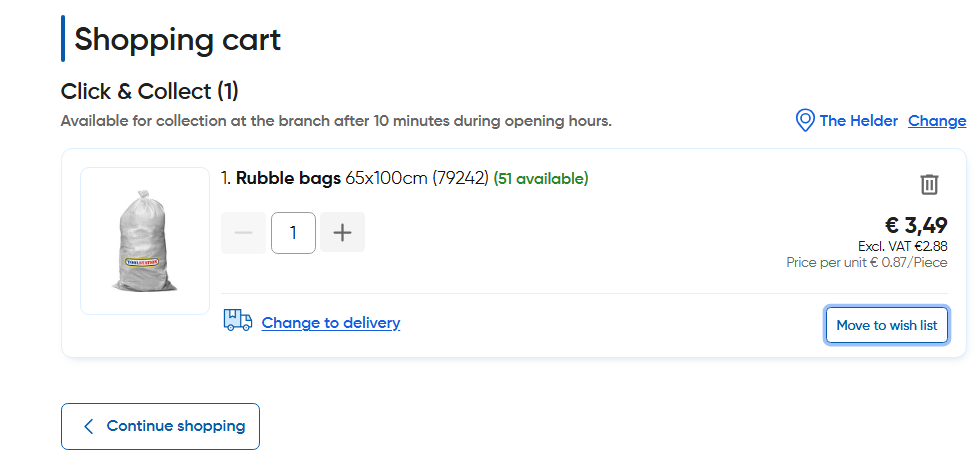
Trolley
- For click and collect items, the branch name is displayed next to the item with an option to change it
- No shipping cost is applied to the trolley
- Changing the branch triggers a global refetch of the
trolley resourceandstock detailsthrough a watcher
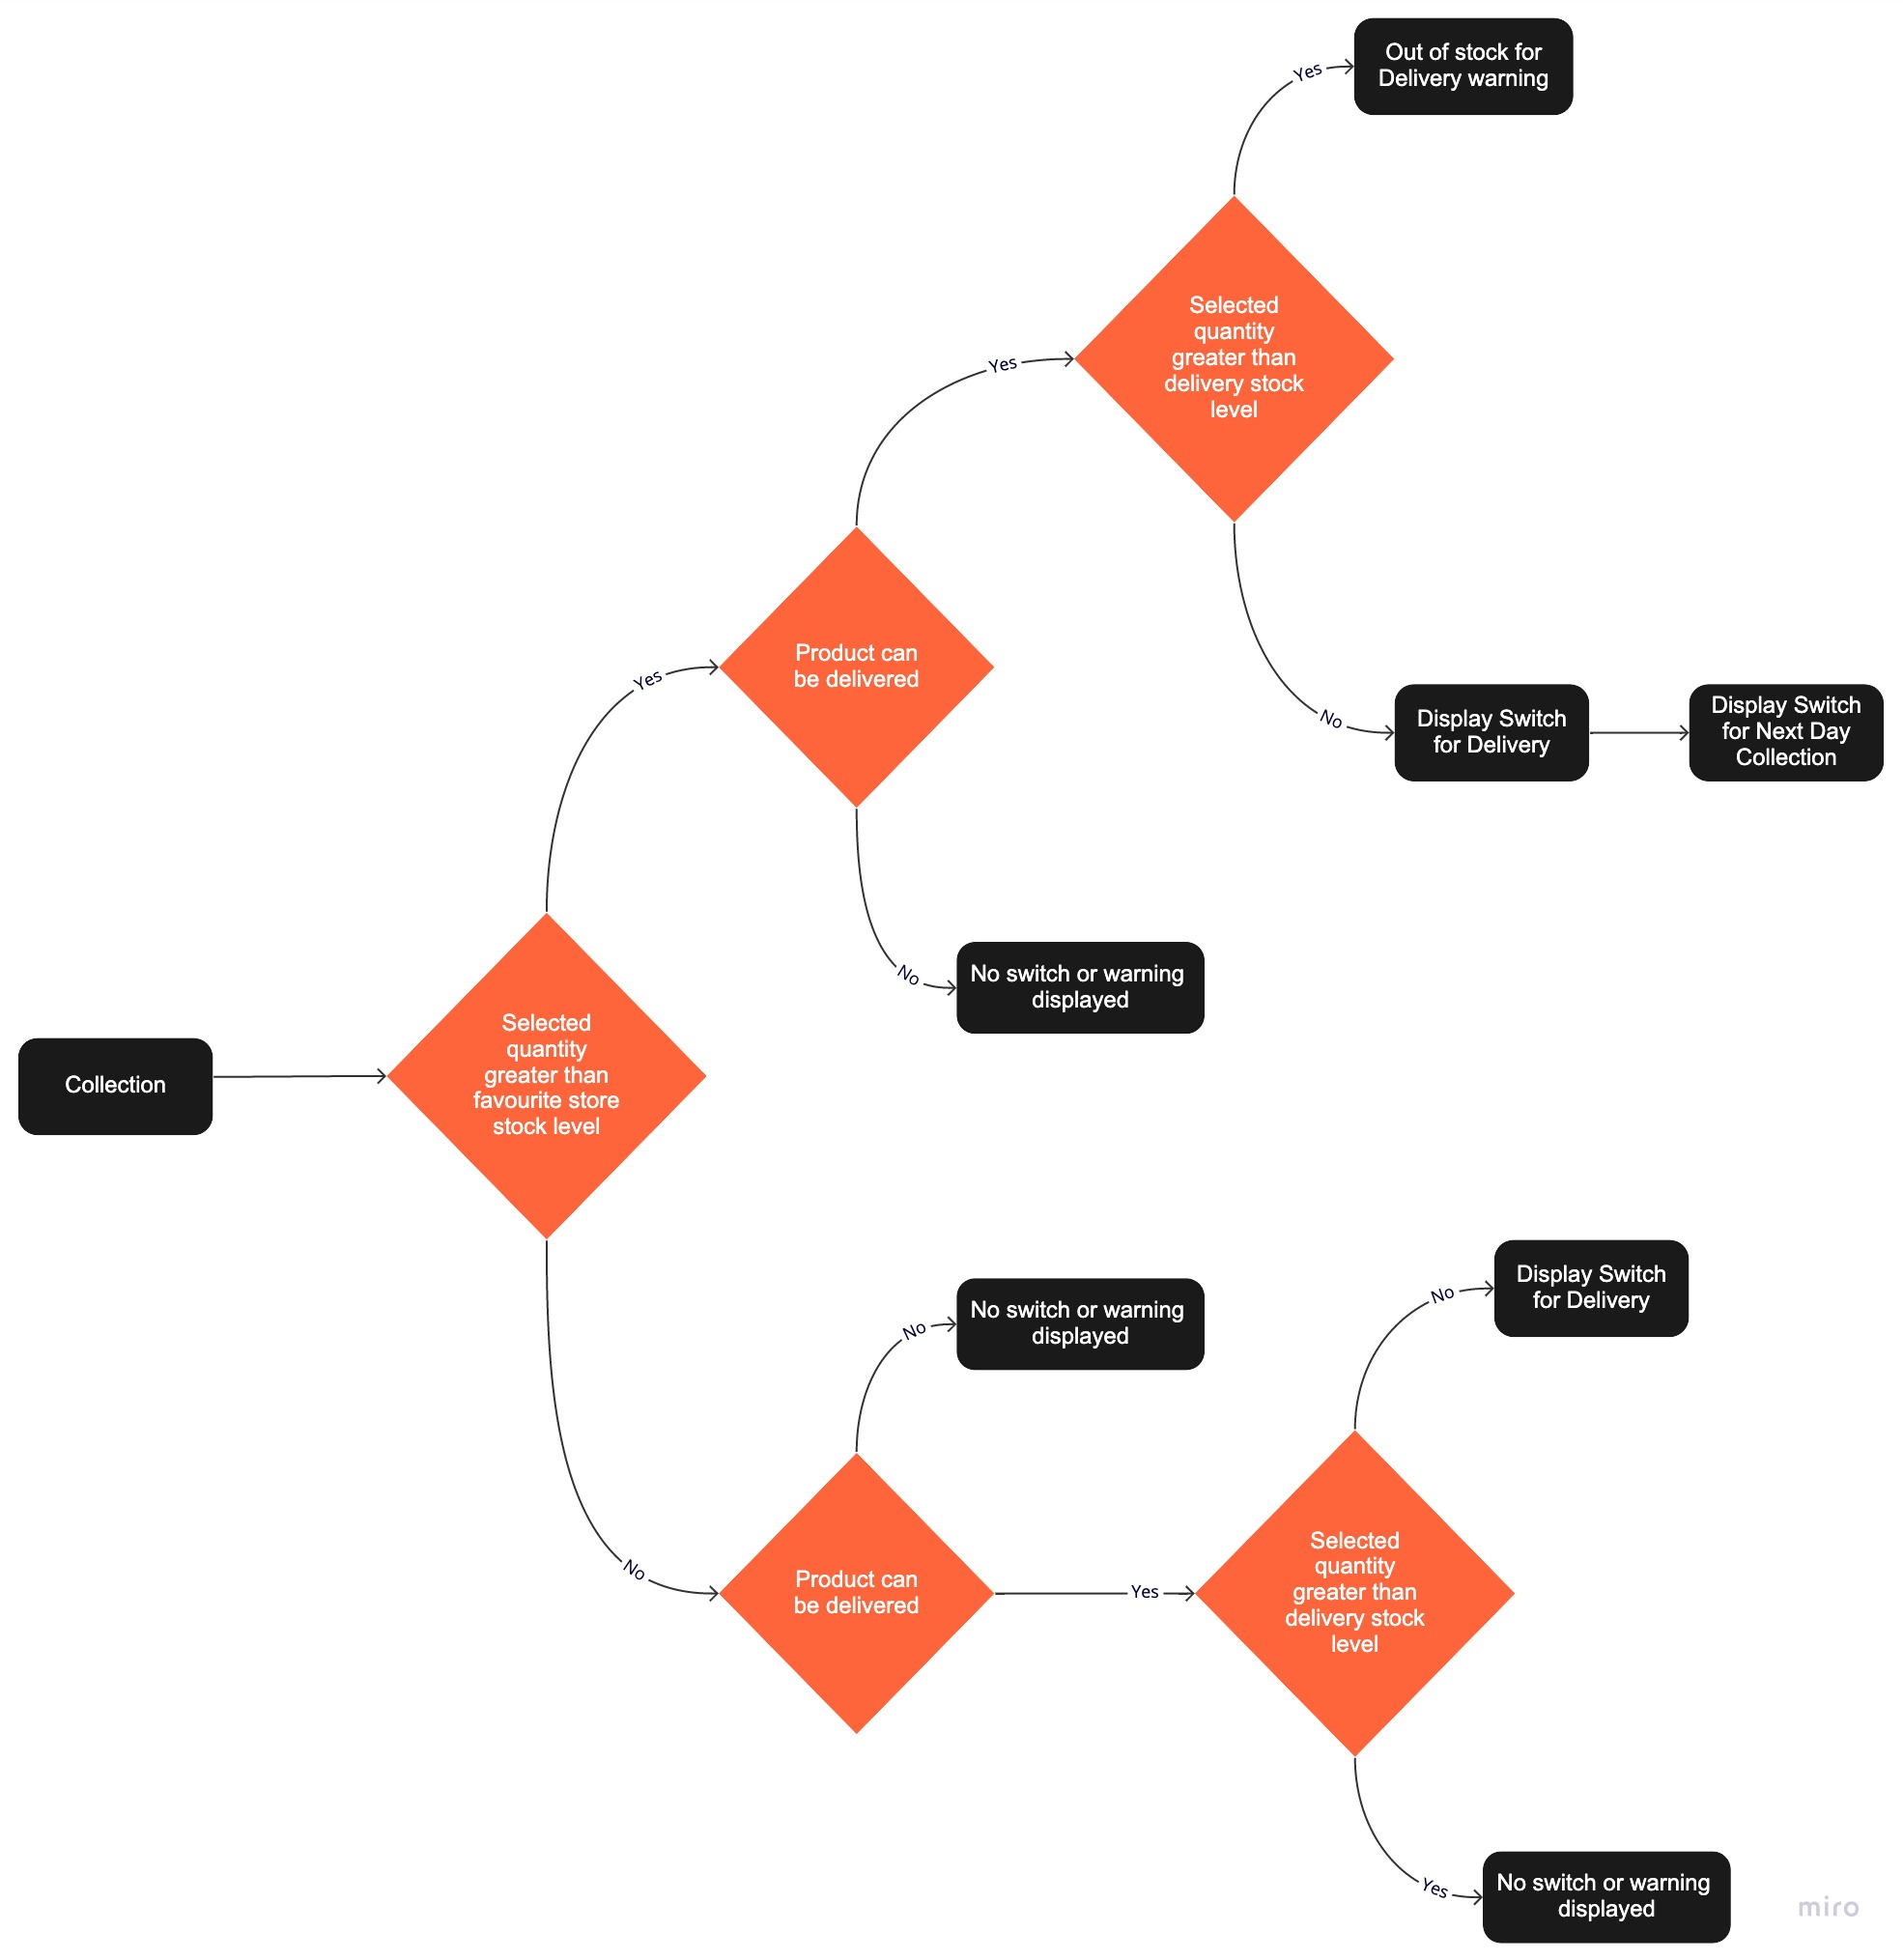
Channel Switch Scenarios
- If quantity of a click and collect item is increased past the available stock at the selected branch,
the item may be moved to "Next Day Collection" only if it lies within the delivery stock
enableNexDaySwitch = collection_stock < quantity < delivery_stock - The above check is also triggered if the user changes the branch in trolley page
- "Switch to delivery" option is shown only if the item has delivery stock > 0
Switching from collection:
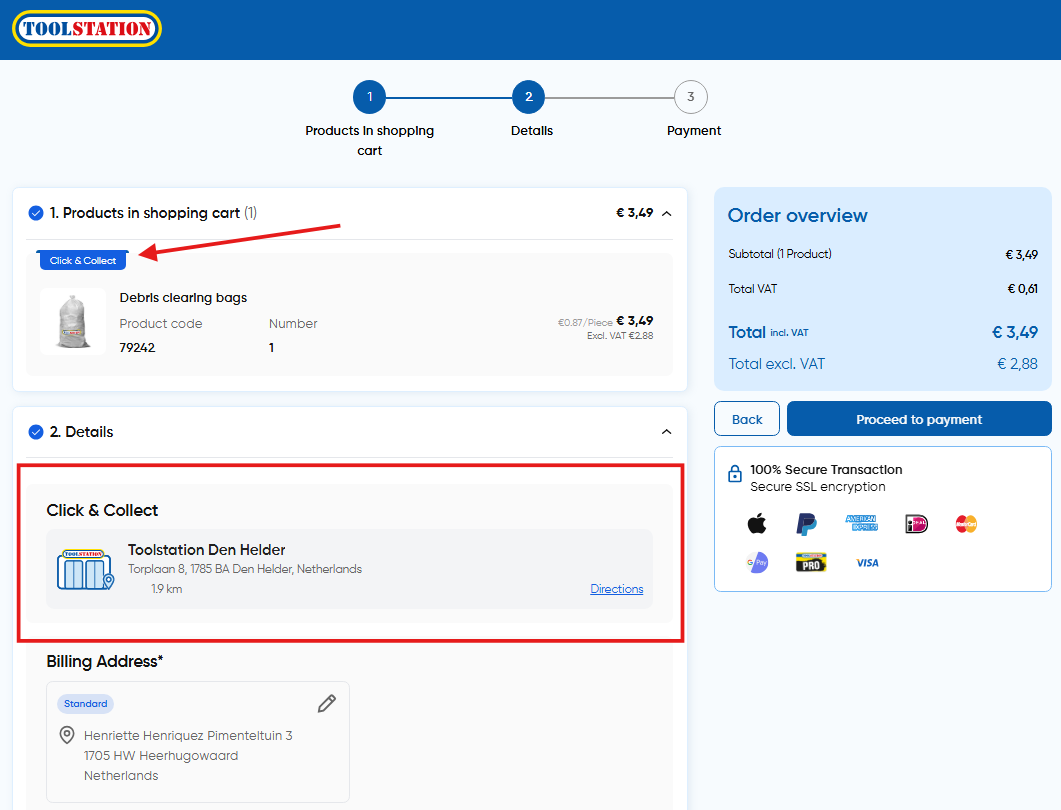
Checkout
- The pickup address card displays address information
on the checkout page which is stored in
checkoutStore.collection_address - Clicking on "directions" opens google maps with the direction guide to the branch
- To place a click and collect order,
collection_address_idandbilling_address_idare crucial to be sent with other parameters to/orderAPI. More info on other parameters here
Order Confirmation (Collection)
- On the confirmation page, order details are fetched from the
/orders/{orderId}endpoint and displayed on the confirmation screen - Orders response contains
site_idwhich is used to fetch the branch details (address and opening hours) from/branches/{siteId}endpoint - User can view the directions to the branch on the confirmation page via map or the Directions CTA
