

Tester Onboarding Document
This document provides a quick guide for testers working on the Toolstation Mobile App project. It covers how to test tickets, execute automation scripts, and follow project-specific QA processes.
Jira Board Introduction
Visit this link url - https://toolstation-support.atlassian.net/jira/your-work
- Once you navigate to Jira homepage, Click on Project option from the left navigation menu.
- Click on Mobile and then EU Mobile App.
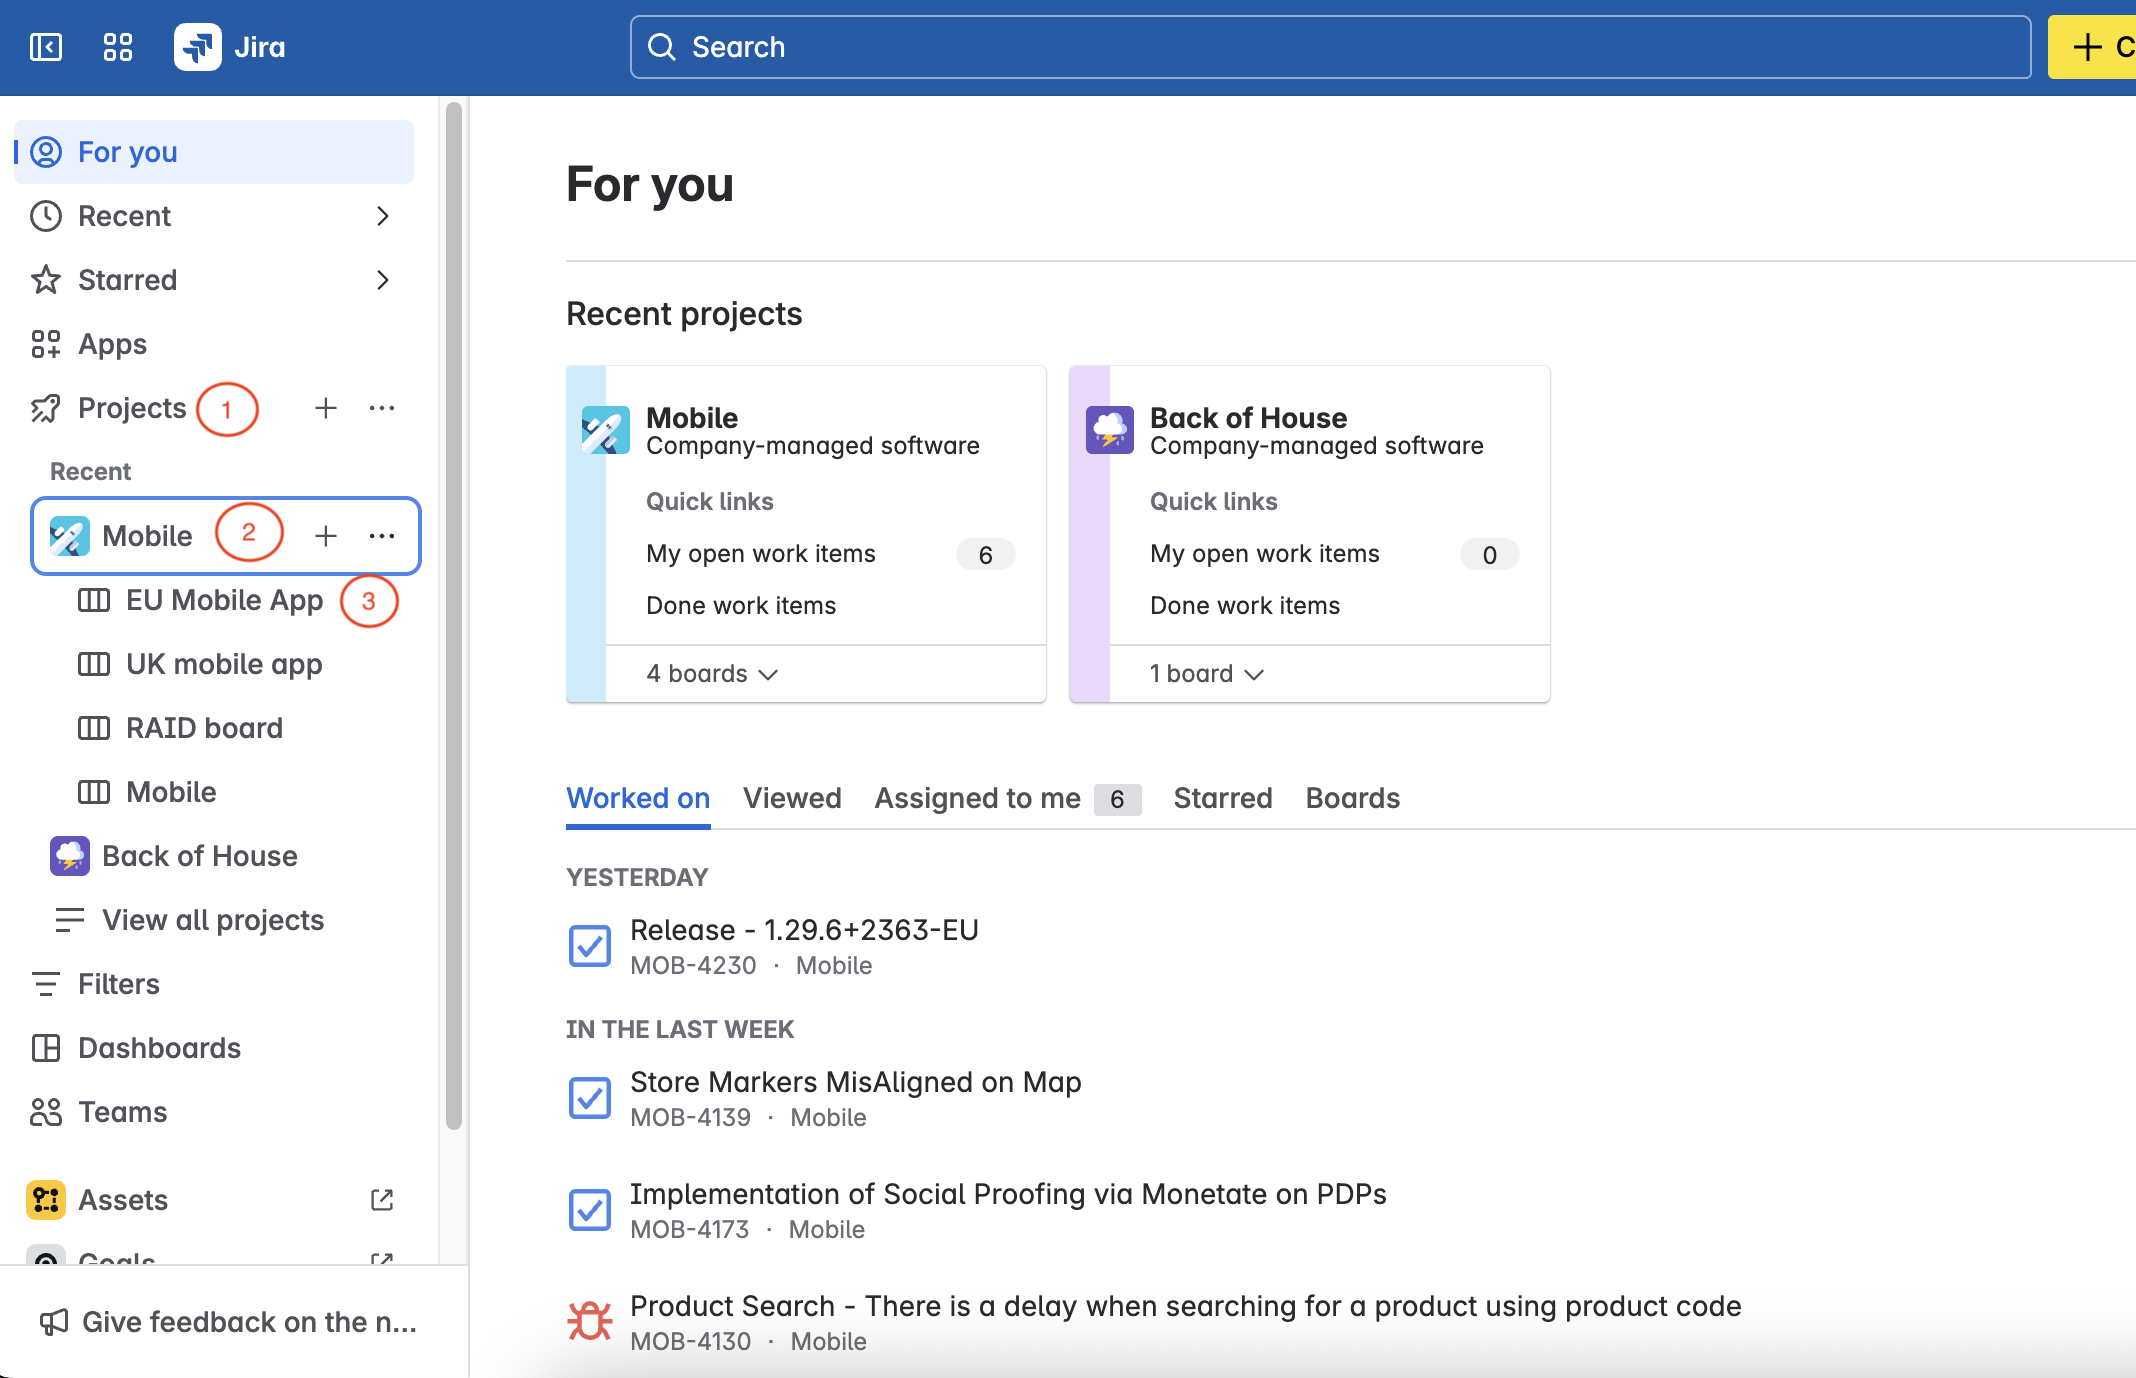
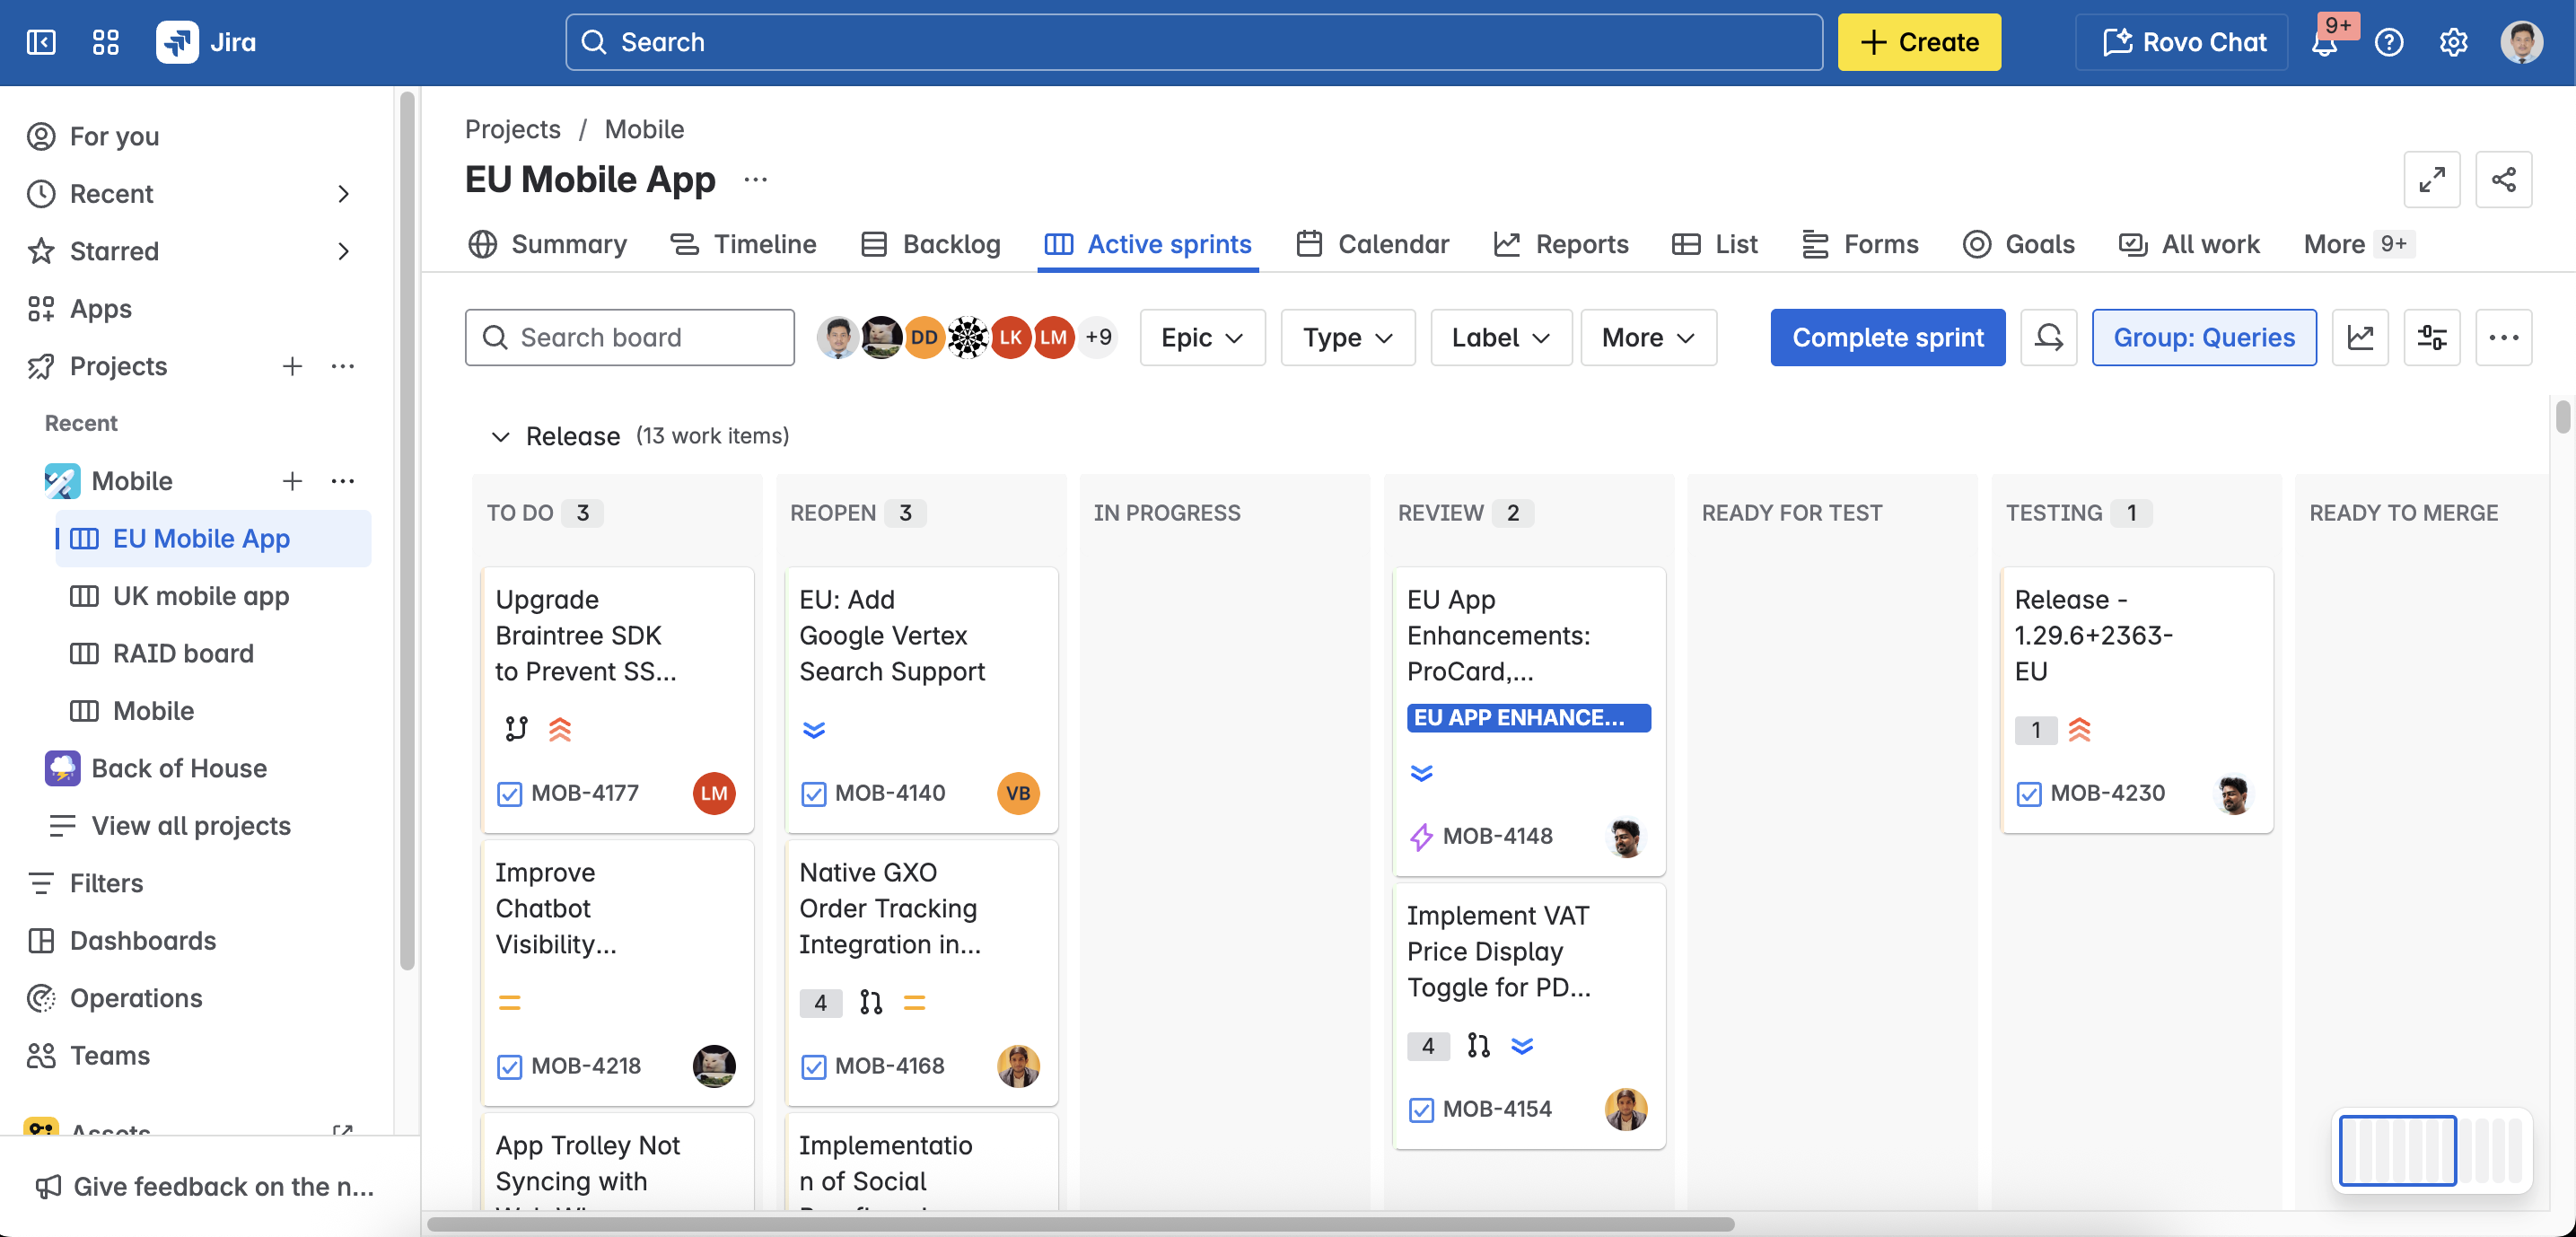
- Review the jira board on the screen (For any doubt, connect with team member).
Ticket Status
We have different status for a ticket created on Jira board
- To Do
- Reopen
- In progress
- Review
- Ready for Test
- Testing
- Ready to Merge
- Ready for Release
- App submitted
- Released
- Submitted
Note:- Ticket status are common and standard used for Software development and Testing R & D if you don’t have knowledge on these status.
How we create a ticket on Jira for any Issue
- Click on Create Button

Fill necessary detail on next screen as shown below
- Project wiill always Mobile (For TS EU App)
- Provide Issue type - Bug (for any defect), Task (for any testing task)
Status - To Do
Summary
Task Example :- Test Case for Login Functionality
Issue Example:- User is not able to login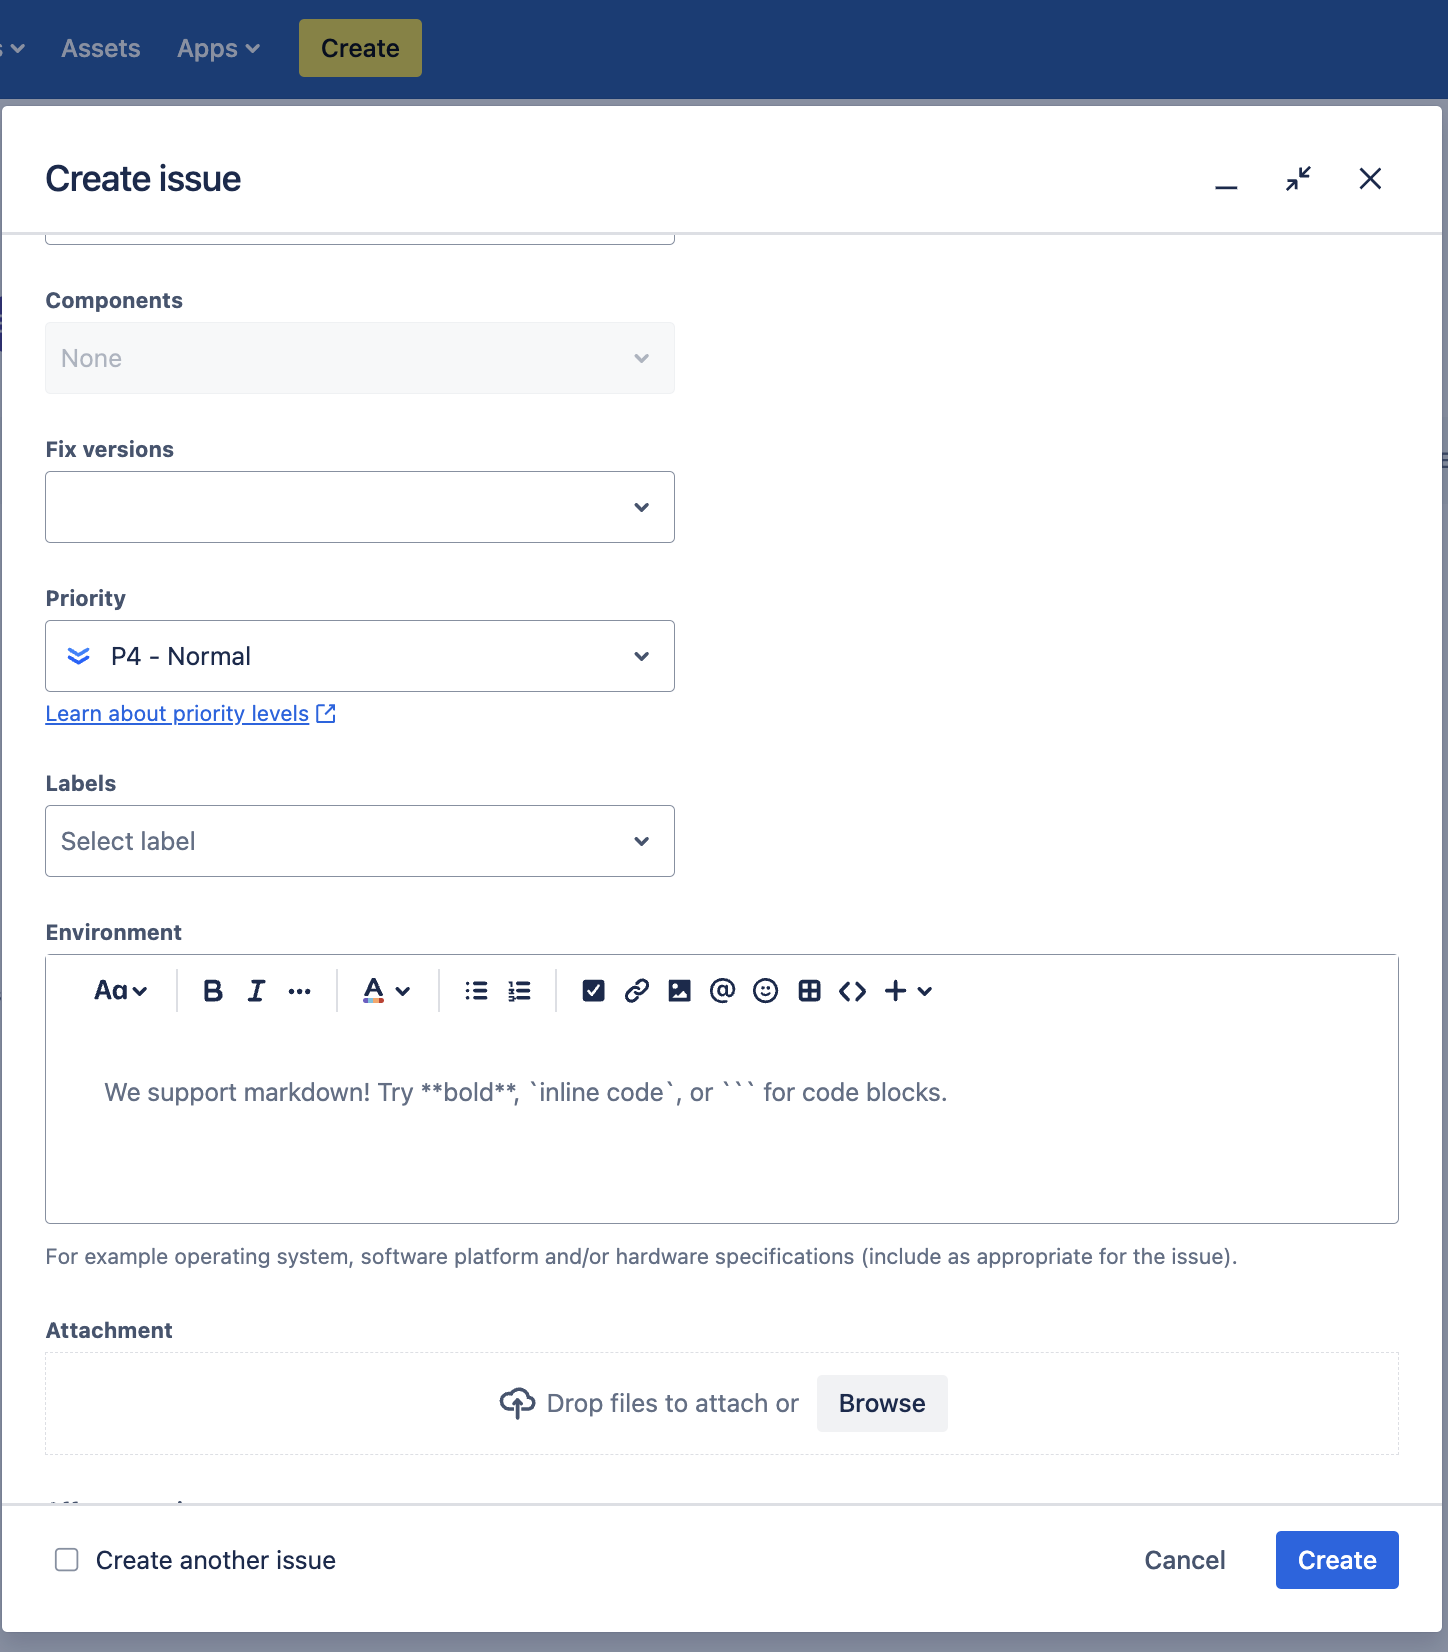
- Description For Issue/Defect - Provide Step to reproduce
- Reporter - Your Name
- Fix Version - If any
- Priority - According to priority of task and issue
- Other - If any
Release Ticket Testing process
A Release Ticket serves as a single point of reference for tracking and ensuring the deployment of prioritized features in a sprint. These features, often defined by stakeholders, are essential for the current release cycle. The ticket consolidates the scope, dependencies, and validation requirements to guarantee smooth deployment within the sprint timeline.
Refer:- Below ticket is an example ticket of Release ticket
- Ticket contains link of all priority ticket which is being released in current sprint
- Plan of action (For manual and automation)
- Other information like “Build”, “Region” etc
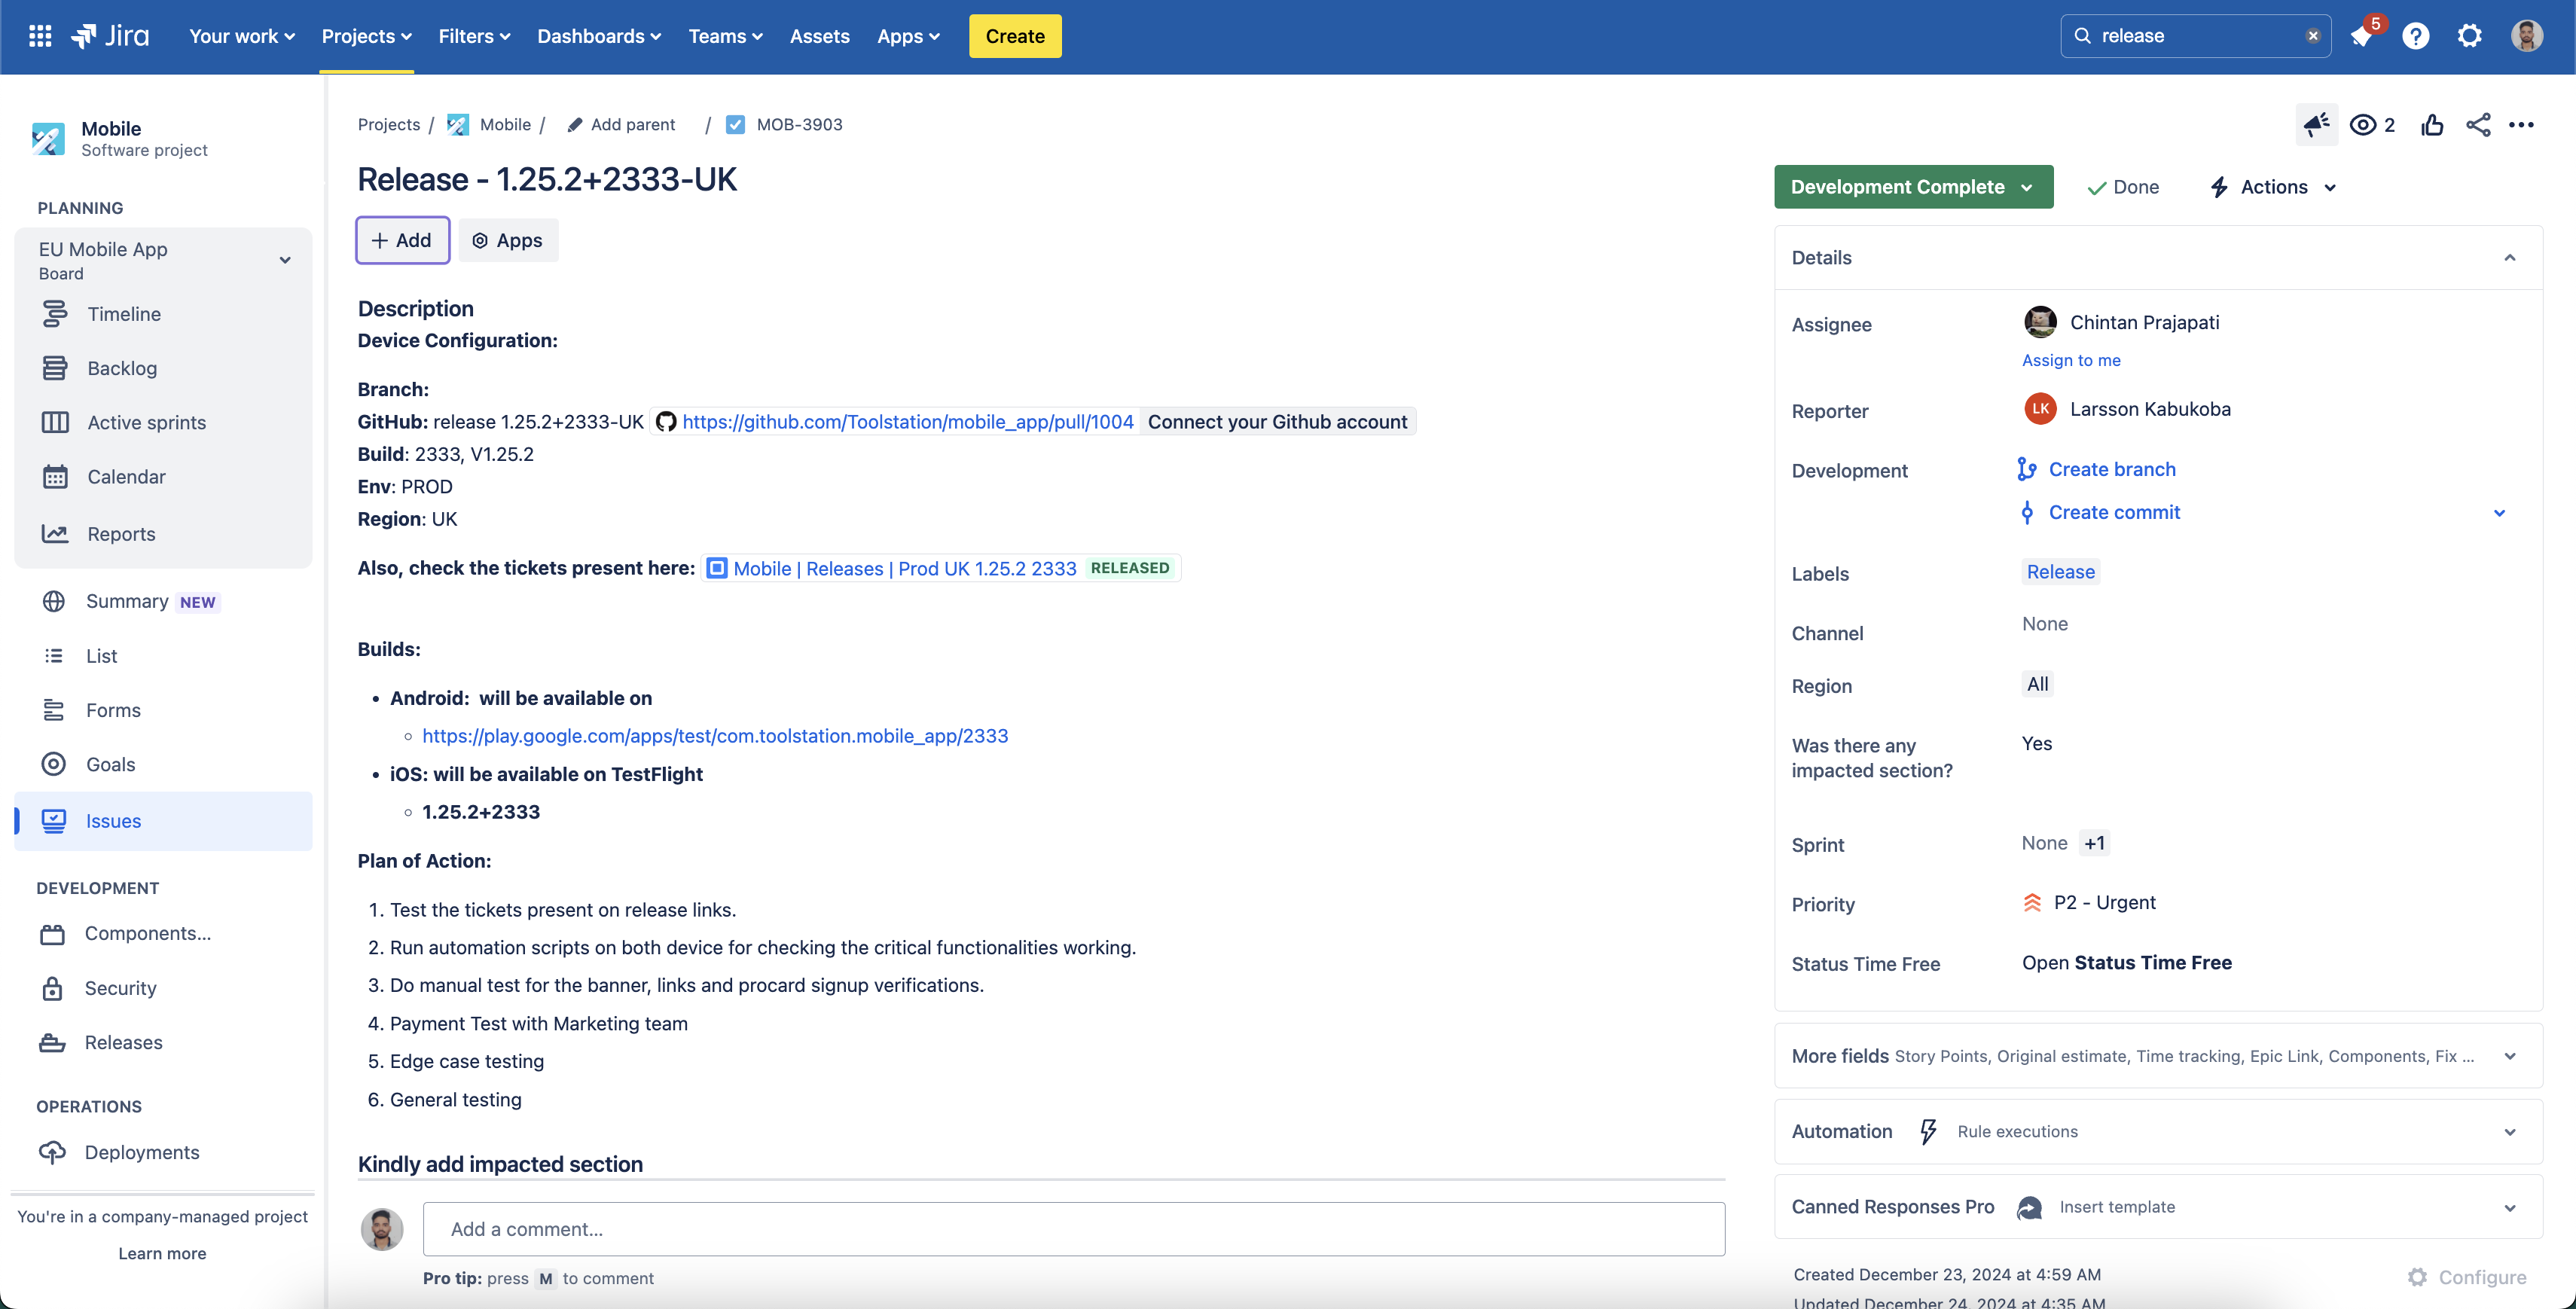
Note:- Study and analyse about the release ticket thoroughly and connect with seniors for any doubt.
Methods to test a release ticket
- We start with smoke testing on the build provided in the release ticket. There are two approaches we follow during smoke testing:
- Automation- Pages: Sign In, Sign Up, Search, Bottom Navigation Bar and Trolley.
- Manual- Pages: Banners, Procard, T&C, privacy policy, FAQs, Payment Testing.
- Note - Payment Testing is done by “Marketing Team” as of now.
- After completing the smoke testing, we manually test all other priority tickets mentioned in the release ticket by executing the documented test cases.

How to install build on Emulator/ Simulator to test release build
Pre - requisites
- Android Studio, Java, Flutter SDK, Xcode, VS Code IDE, GitKraken needs to be installed on your mac.
- Xcode setup (Create a Apple ID - access is raised by Product Owner, once your id is setup all other setup for xcode is done by Larrson)
- Emulator setup - Follow the steps mentioned in this video.
- Mobile App Repo - https://github.com/Toolstation/mobile_app
- Testing App Repo - https://git6.webreinvent.com/toolstation/toolstation-testing-mobile
Kindly refer to this playlist and follow all the steps mentioned in the videos to configure your system before installing the builds.
Setup Mobile App Repository
First we need to clone the mobile_app repository. (https://github.com/Toolstation/mobile_app)
After cloning app repo, we add an SSH key to our GitHub account, so git operations from any tool (like VS Code or terminal) are authenticated. In the VS Code IDE of this project, open the terminal and follow the steps mentioned below to add key:
- Generated a new SSH key using your primary email of GitHub. Execute the command given below.
ssh-keygen -t ed25519 -C "your_primary_email@example.com" - Add the generated SSH key to your local SSH agent so the terminal could use it. Execute the command given below.
eval "$(ssh-agent -s)" ssh-add ~/.ssh/id_ed25519 - Copy the public key and add it to your GitHub account. Execute the command given below.
cat ~/.ssh/id_ed25519.pub - Add the public key to GitHub
- Go to https://github.com/settings/keys
- Click New SSH key
- Title: Add any title like
MacBook Terminal Key - Key: Paste the copied content
- Click Add SSH Key
- Test the SSH connection to GitHub. Execute the command given below.
ssh -T git@github.com
You will get a message saying: 'Hi yourusername! You've successfully authenticated... but etc.'
Now ssh key for VS Code terminal is added and ready to use.
Note: This is one time setup, you don't need to do this every time when installing the build.
Install Build Steps
Once the above installation and access are completed, we can proceed to with the build installation and check out the latest release ticket branch. Follow the steps below to install the build on a simulator, emulator
- Open the cloned repo Mobile App repository on VS Code IDE.
- On Gitkraken, checkout latest release ticket branch by double clicking on it.
- Confirm twice whether we are on the latest release ticket branch or not.
- Choose device for installing build. (Emulator / Simulator / Testing Phone)
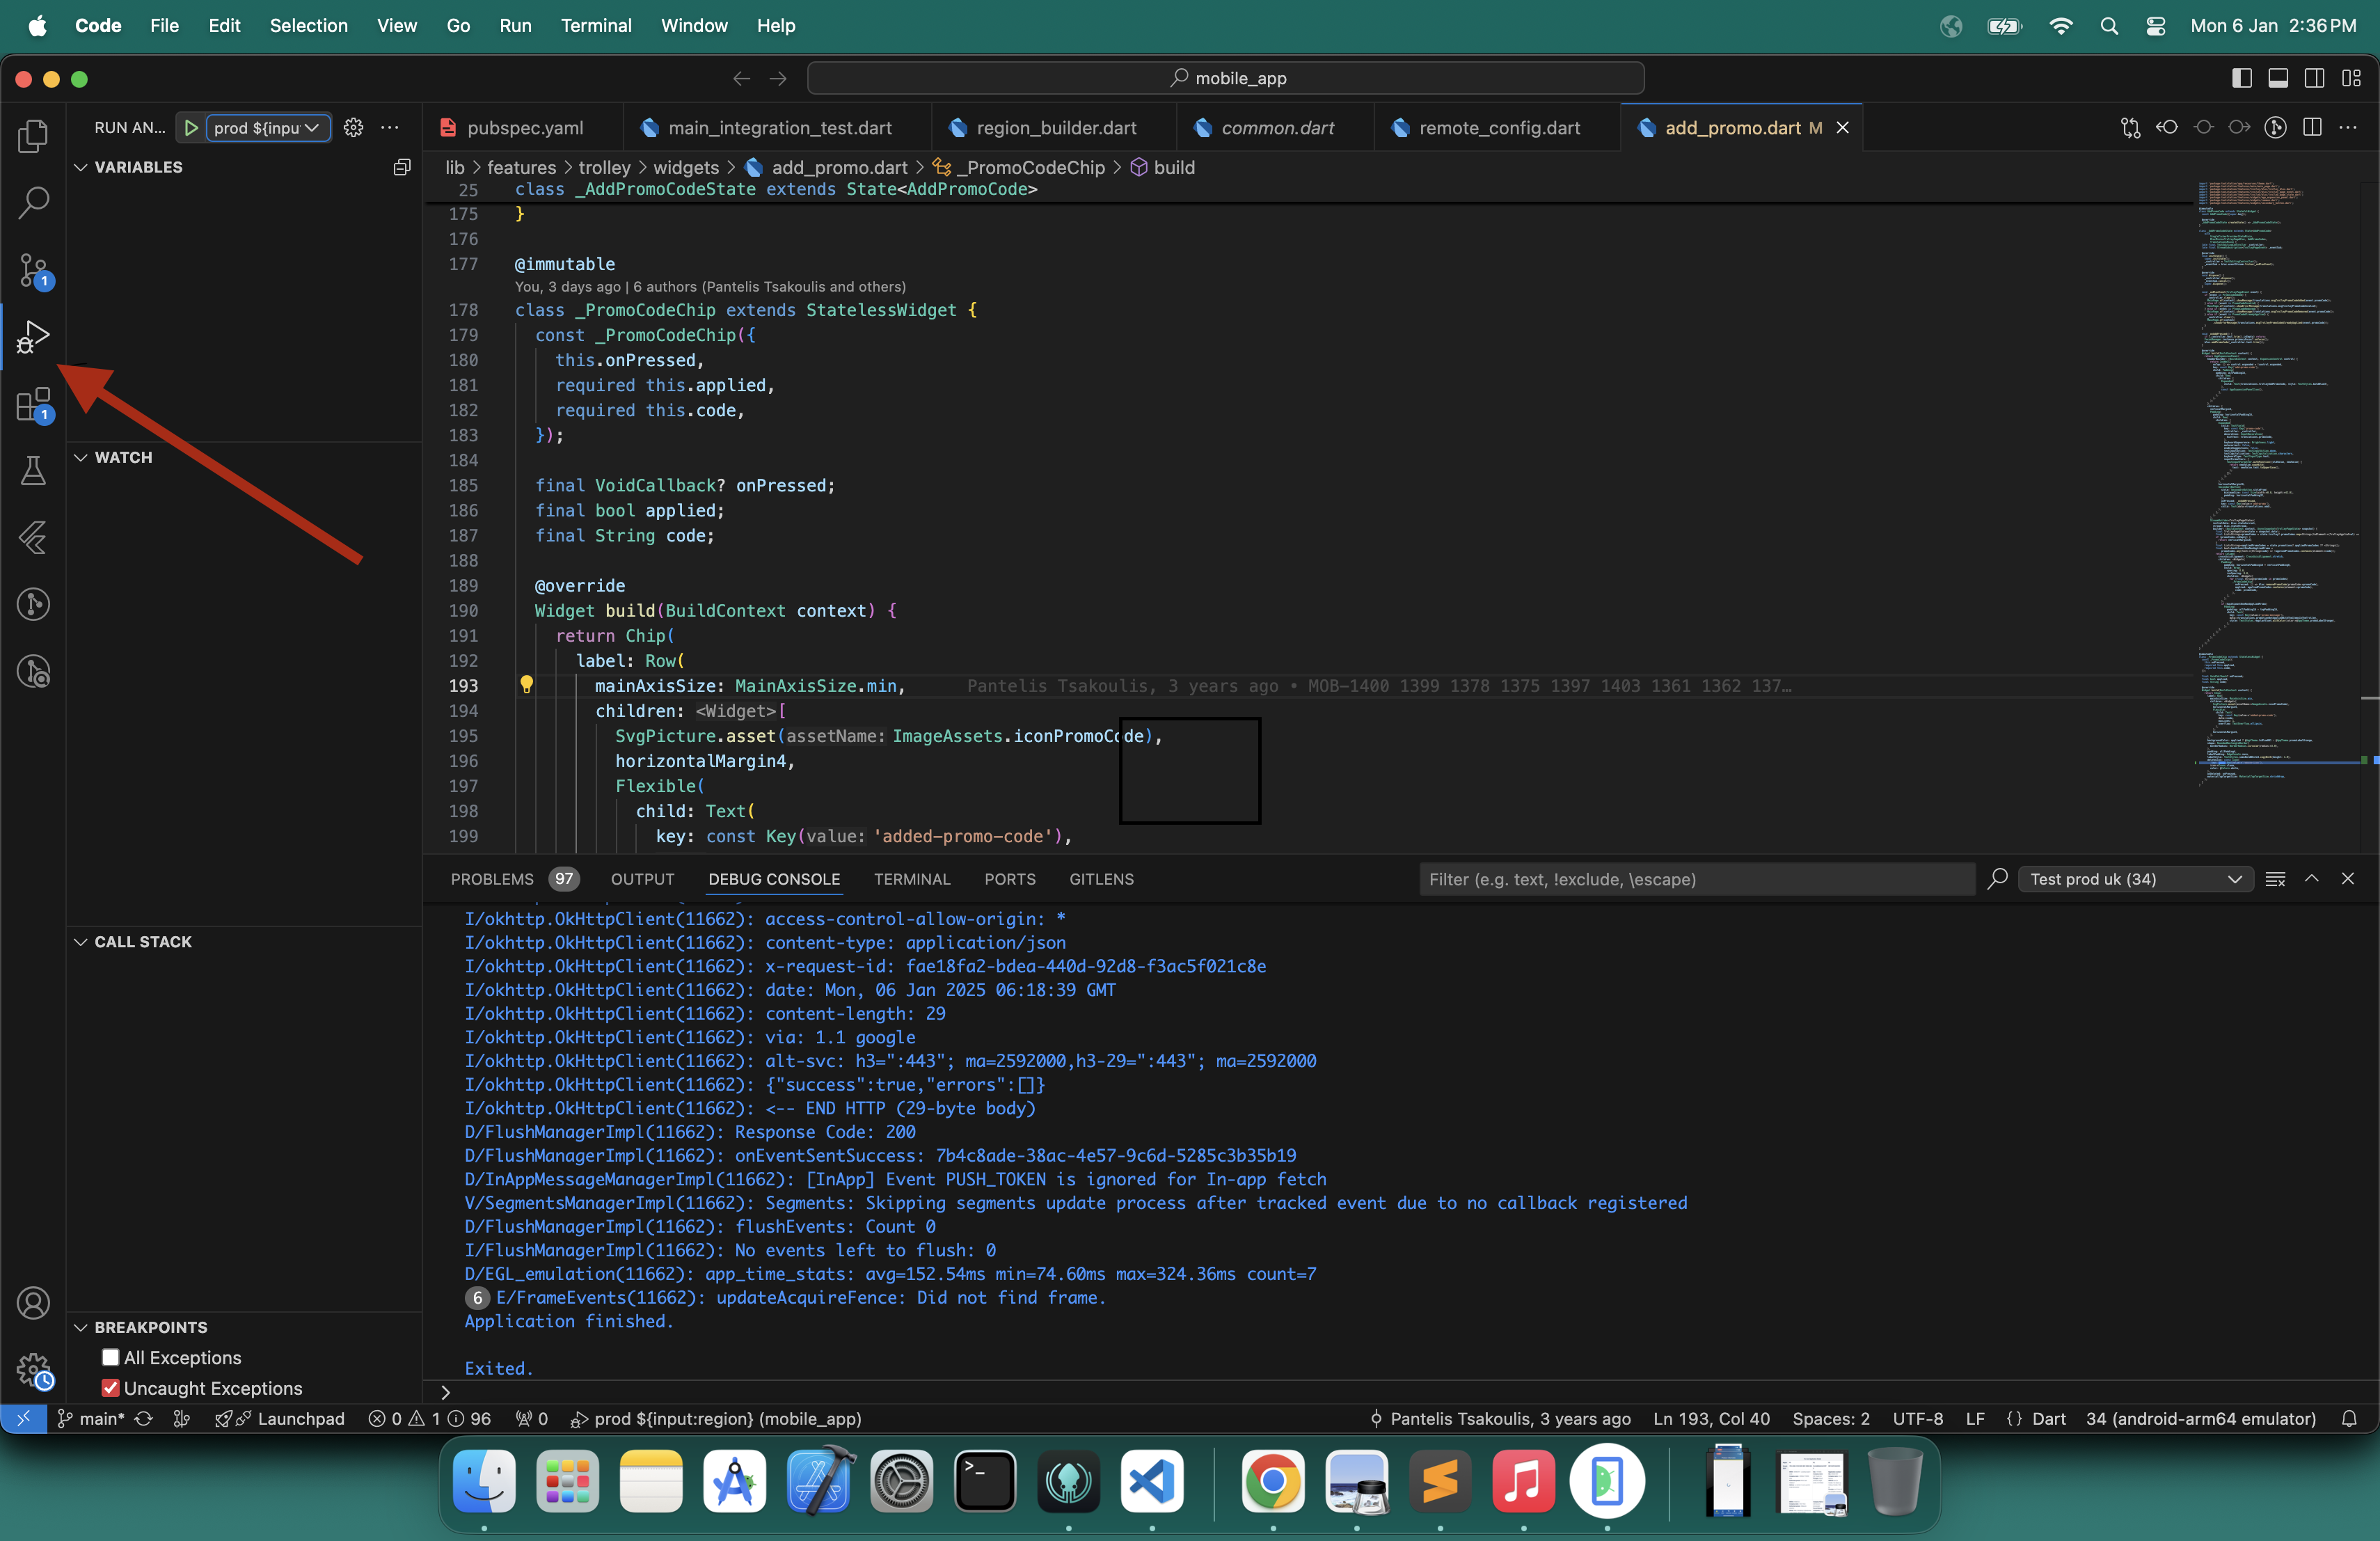
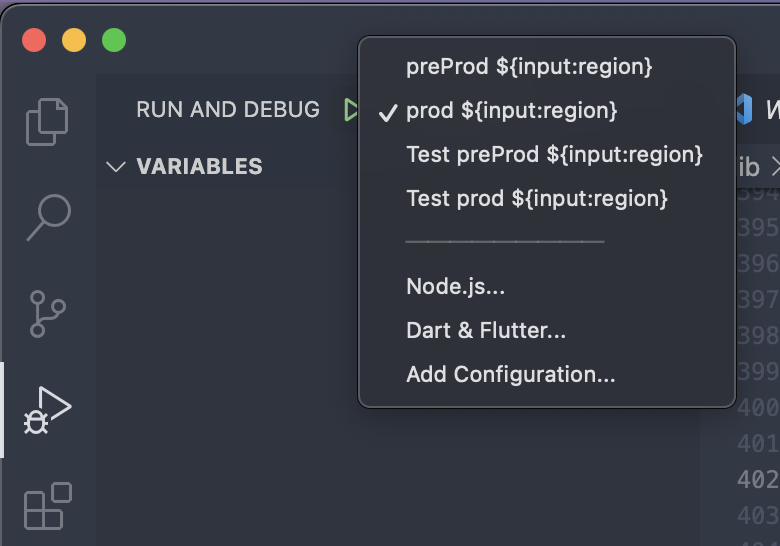
- Once you started / connected the device (Real or virtual), Click on debug option on vs code ( Refer snap below, active icon).
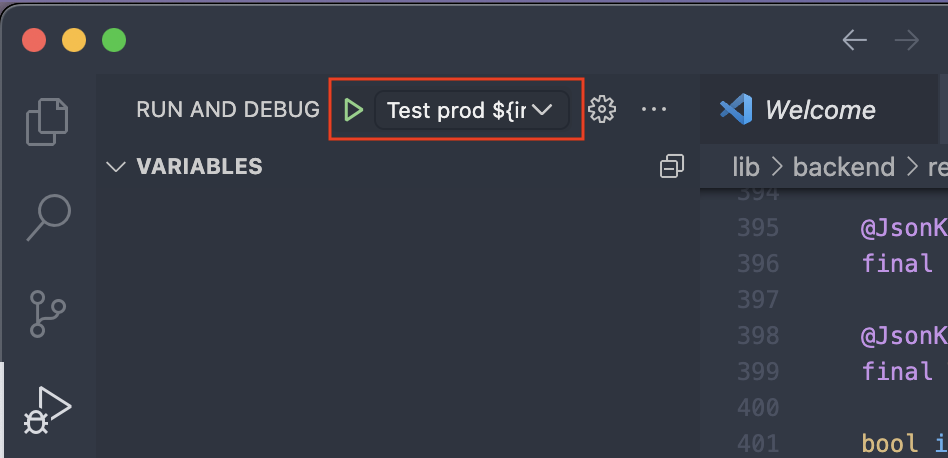
- Click on play button on top header of vs code while the option is set as test prod (Refer below snap). If any other option is selectes, click on it and select the test prod option.
- Select region (uk, nl, be, fr)
Note - Region is mentioned on ticket (if uk then we have to select uk, if eu is mentioned then we have to build for both nl and be, if both uk and eu is mentioned then we have to build for uk, nl, be)
- Once you have selected the region, the build process will begin. Please wait until the build is completed.
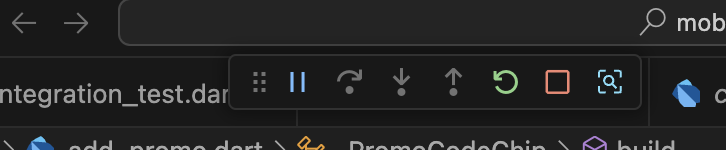
- Once build is installed on the virtual device, we have to stop build by click on red icon.
- Once you stopped the installed build, open testing mobile repo on vs code and setup your repo as you followed while training (Tester roadmap).
For a complete step by step guide, kindly refer to this demo video on how to install builds.
How to Execute Smoke Test Scripts on Emulator/ Simulator.
Pre - requisites
- Toolstation testing mobile repository is cloned.
- The emulator/simulator device should be opened and running.
Configure .env file
Follow the steps mentioned down below:
- Open the cloned
toolstation-testing-mobilerepository on VS Code IDE. - Make sure you are on the latest develop branch. Check it in the Gitkraken.
- Open
.envfile. - Add the path of mobile-app repository in the
MOBILE_APP_REPO_LOCATIONenvironment variable. Follow the steps mentioned in this video to the add path. - Add the app version and build number in
APP_VERSION_NUMBERandAPP_BUILD_NUMBERrespectively. You can get the app version and build number from the release ticket title.
Eg. Release ticket title: Release - 1.29.6+2363-EU App version will be: 1.29.6 App built number will be: 2363. - Add name and version of your android emulator in
ANDROID_DEVICE_NAMEandANDROID_VERSIONrespectively. To verify the name and version of your android emulator, refer to this video. - Similarly, add the name and version of your iOS simulator in
IOS_DEVICE_NAMEandIOS_VERSION. The name and iOS version were writen at the top of your simulator device. - For the last environment variable
DEFAULT_APP_IDENTIFIER, we only need to update this when we are executing any specific test case. We can leave this as it is for now.
Execute smoke scripts
Follow the steps mentined down below to execute the smoke scripts on the release build.
- Make sure the
.envfile is configured and the test prod aap has been build as mentioned in Install Build Steps section. - Make sure the emulator/simulator device is open and running.
- Delete the
allure-resultsdirectory if already present in toolstation. (Do not deleteallure-reportdirectory) - Click on the Run and Debug button in the VSCode IDE of
toolstation-testing-mobileproject.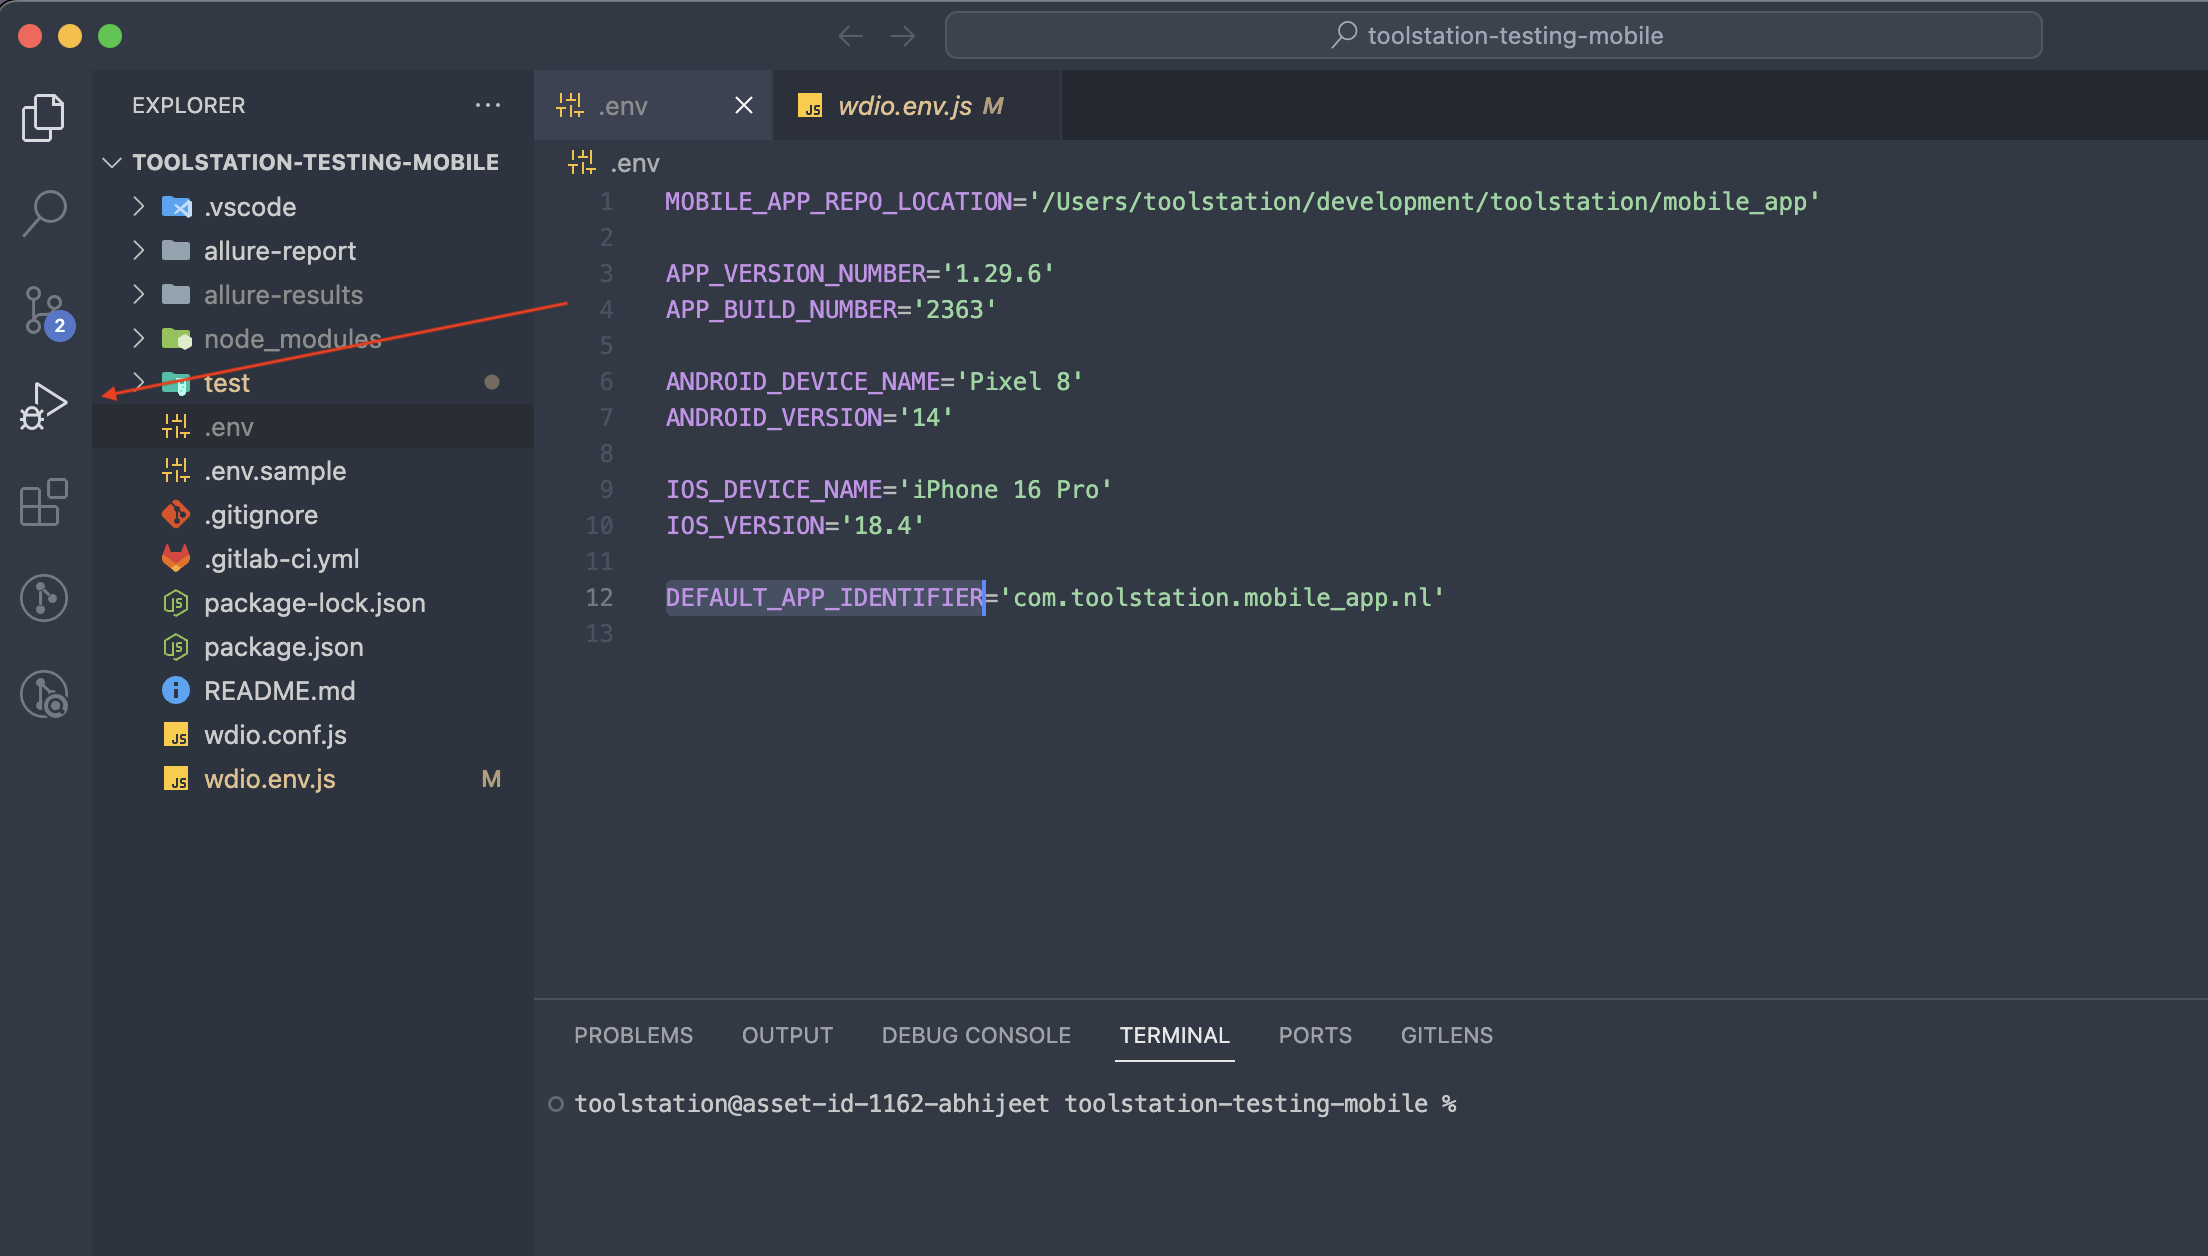
- Click on the button beside the play button to open the option menu and select Run all the tests.

- Click on the play button at the top-left corner of the IDE.
- Select the device in which you want to execute the tests (android/ios). Make sure the specific emulator/simulator device is opened before execution.
- Select the region for which you want to execute the tests (uk/be/nl). Make sure the test prod app has been build for the region before execution.
- Upon selecting the region, the smoke tests scriots will be executed and the logs will be visible on the console.
If you have confusion/concerns about the steps mentioned above, kindly refer to the video on how to execute smoke script for release.
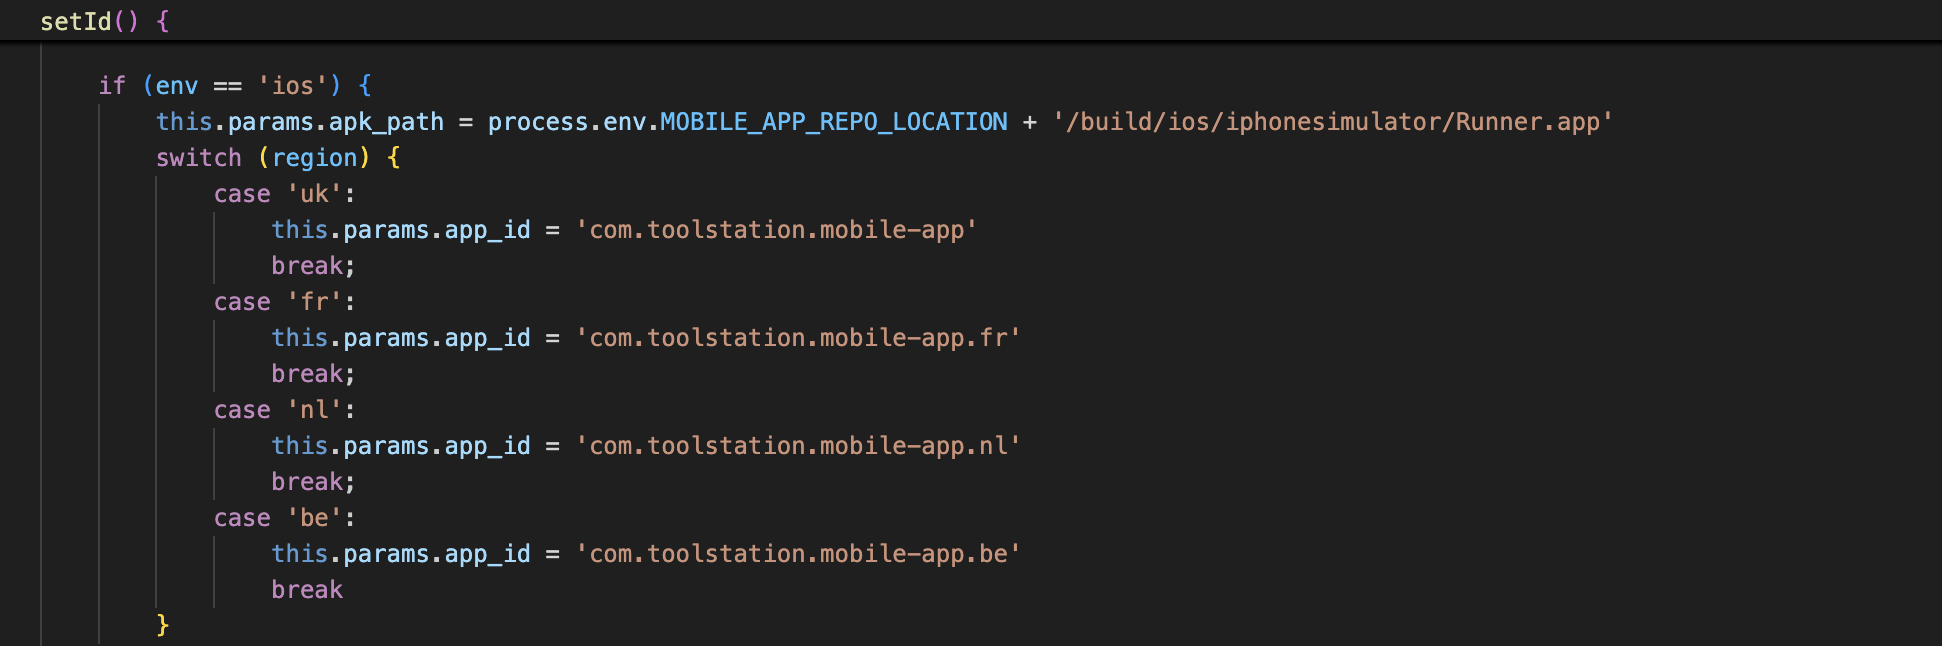
Refer below for other app id in switch case block (start from com.toolstation)
Note:- For further info, connect with Senior
Allure Report Generation
Once test script execution is completed, we have to generate allure report
Steps to generate Allure report
- Delete 'allure-results' directory before execution. (This needs to be done before executing any scripts)
- Execute the script.
- Copy 'history' directory from 'allure-report' and paste it in 'allure-results' directory.
- Run command
allure generate allure-results --clean - Open
summary.jsonfile in allure-report directory.
(Navigate toallure-report/widgets/summary.json) - In the begenning, there is an object 'reportName'. Update the value of this object as 'Smoke Test Report - (Region) Release: (app_version), (app_build_number)'.
Eg: Smoke Test Report - EU Release: 1.29.6, 2363 - To open the generated report, execute this command:
allure open - Commit and push allure report.
- Create a tag on the pushed commit with a specific keyword: 'devops-feature/'.
- Right click on the pushed commit and select create tag option at the bottom.
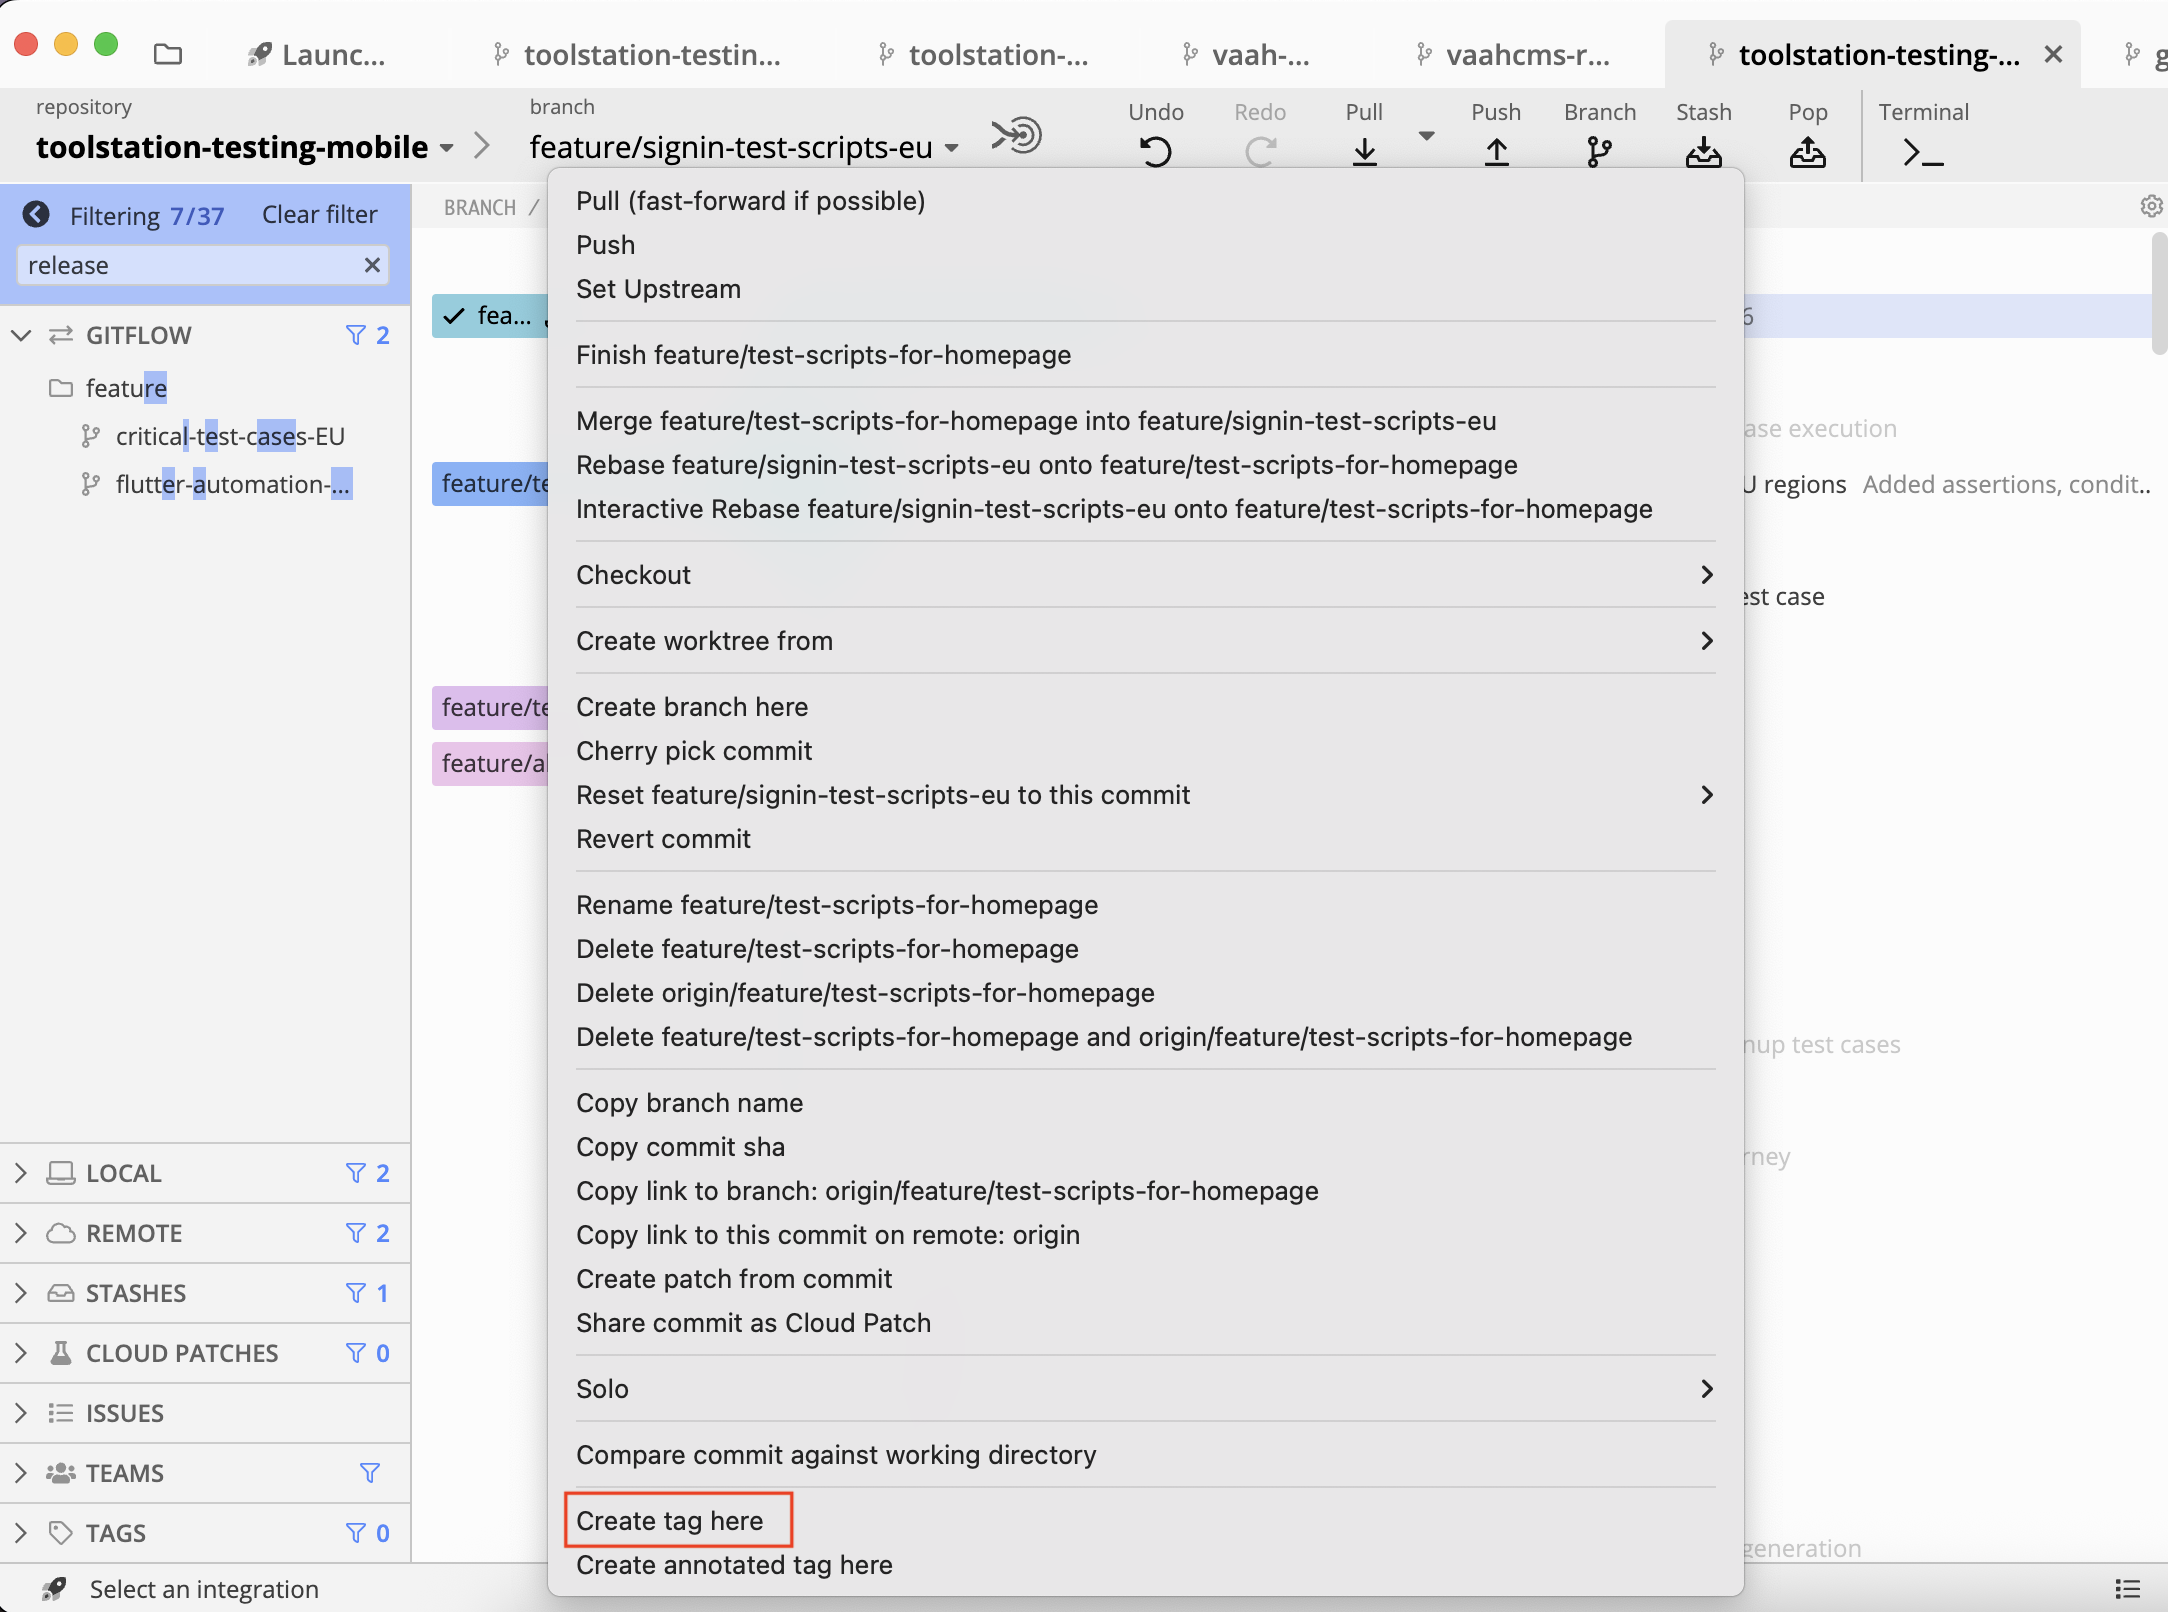
- Add a tag name with prefix 'devops-feature/'.
Eg. 'devops-feature/allure-report-generation-v3'. - After adding the tag name, click on the push button on the top menu. This will push the created tag to origin.
- Right click on the pushed commit and select create tag option at the bottom.
- Go to jobs page of
toolstation-testing-mobilerepository. URL. - At the top, a job will be visible with the concerened person who created the job. Click on the job.
- Copy the public URL of the allure report added at the bottom and paste in JIRA ticket.
If you face any problems, kindly refer to the steps mentioned in this video on how to generate shareable allure report.
If allure commands are not working on toolstation-testing-mobile repository, then we may need to do some change in .zshrc file to execute allure commands. Consult to a senior for this one.
Normal Ticket Testing process
Apart from the release tickets, we do testing for a normal ticket that may be a bug or a feature. We only pick that are assigned to us with status 'Ready for test'.
The first step is to change the status of the ticket from 'Ready for test' to 'Testing'.
Study the ticket
- Read the ticket title and description. Try to find out what the issue/feature is on the ticket.
- Read the ticket comments for the latest developments on the ticket. This will help in gaining some context about the latest findings of the ticket.
- Check the 'Details' panel added on the right side of the ticket. From here you can get several environments that helps you to test out the ticket.
- Label -
Release,P12orP34 - Region - Region on which you need to test the ticket.
- Priority - Priority of the ticket. You have to pick P1 & P2 issue first before moving to P3 & P4. There are other fields as well, but those are not relevant for testing.
- Label -
- Check the impacted area section added in the ticket. This will have the test intructions such as region (UK/NL/BE), environments (PROD/PREPROD) and the affected pages that needs to be tested.
Install the app on physical/virtual device.
- Open
mobile-apprepository on Gitkraken. - Discard any changes, if there are any.
- Search for the ticket that you need to test by adding the ticket number in the search bar.
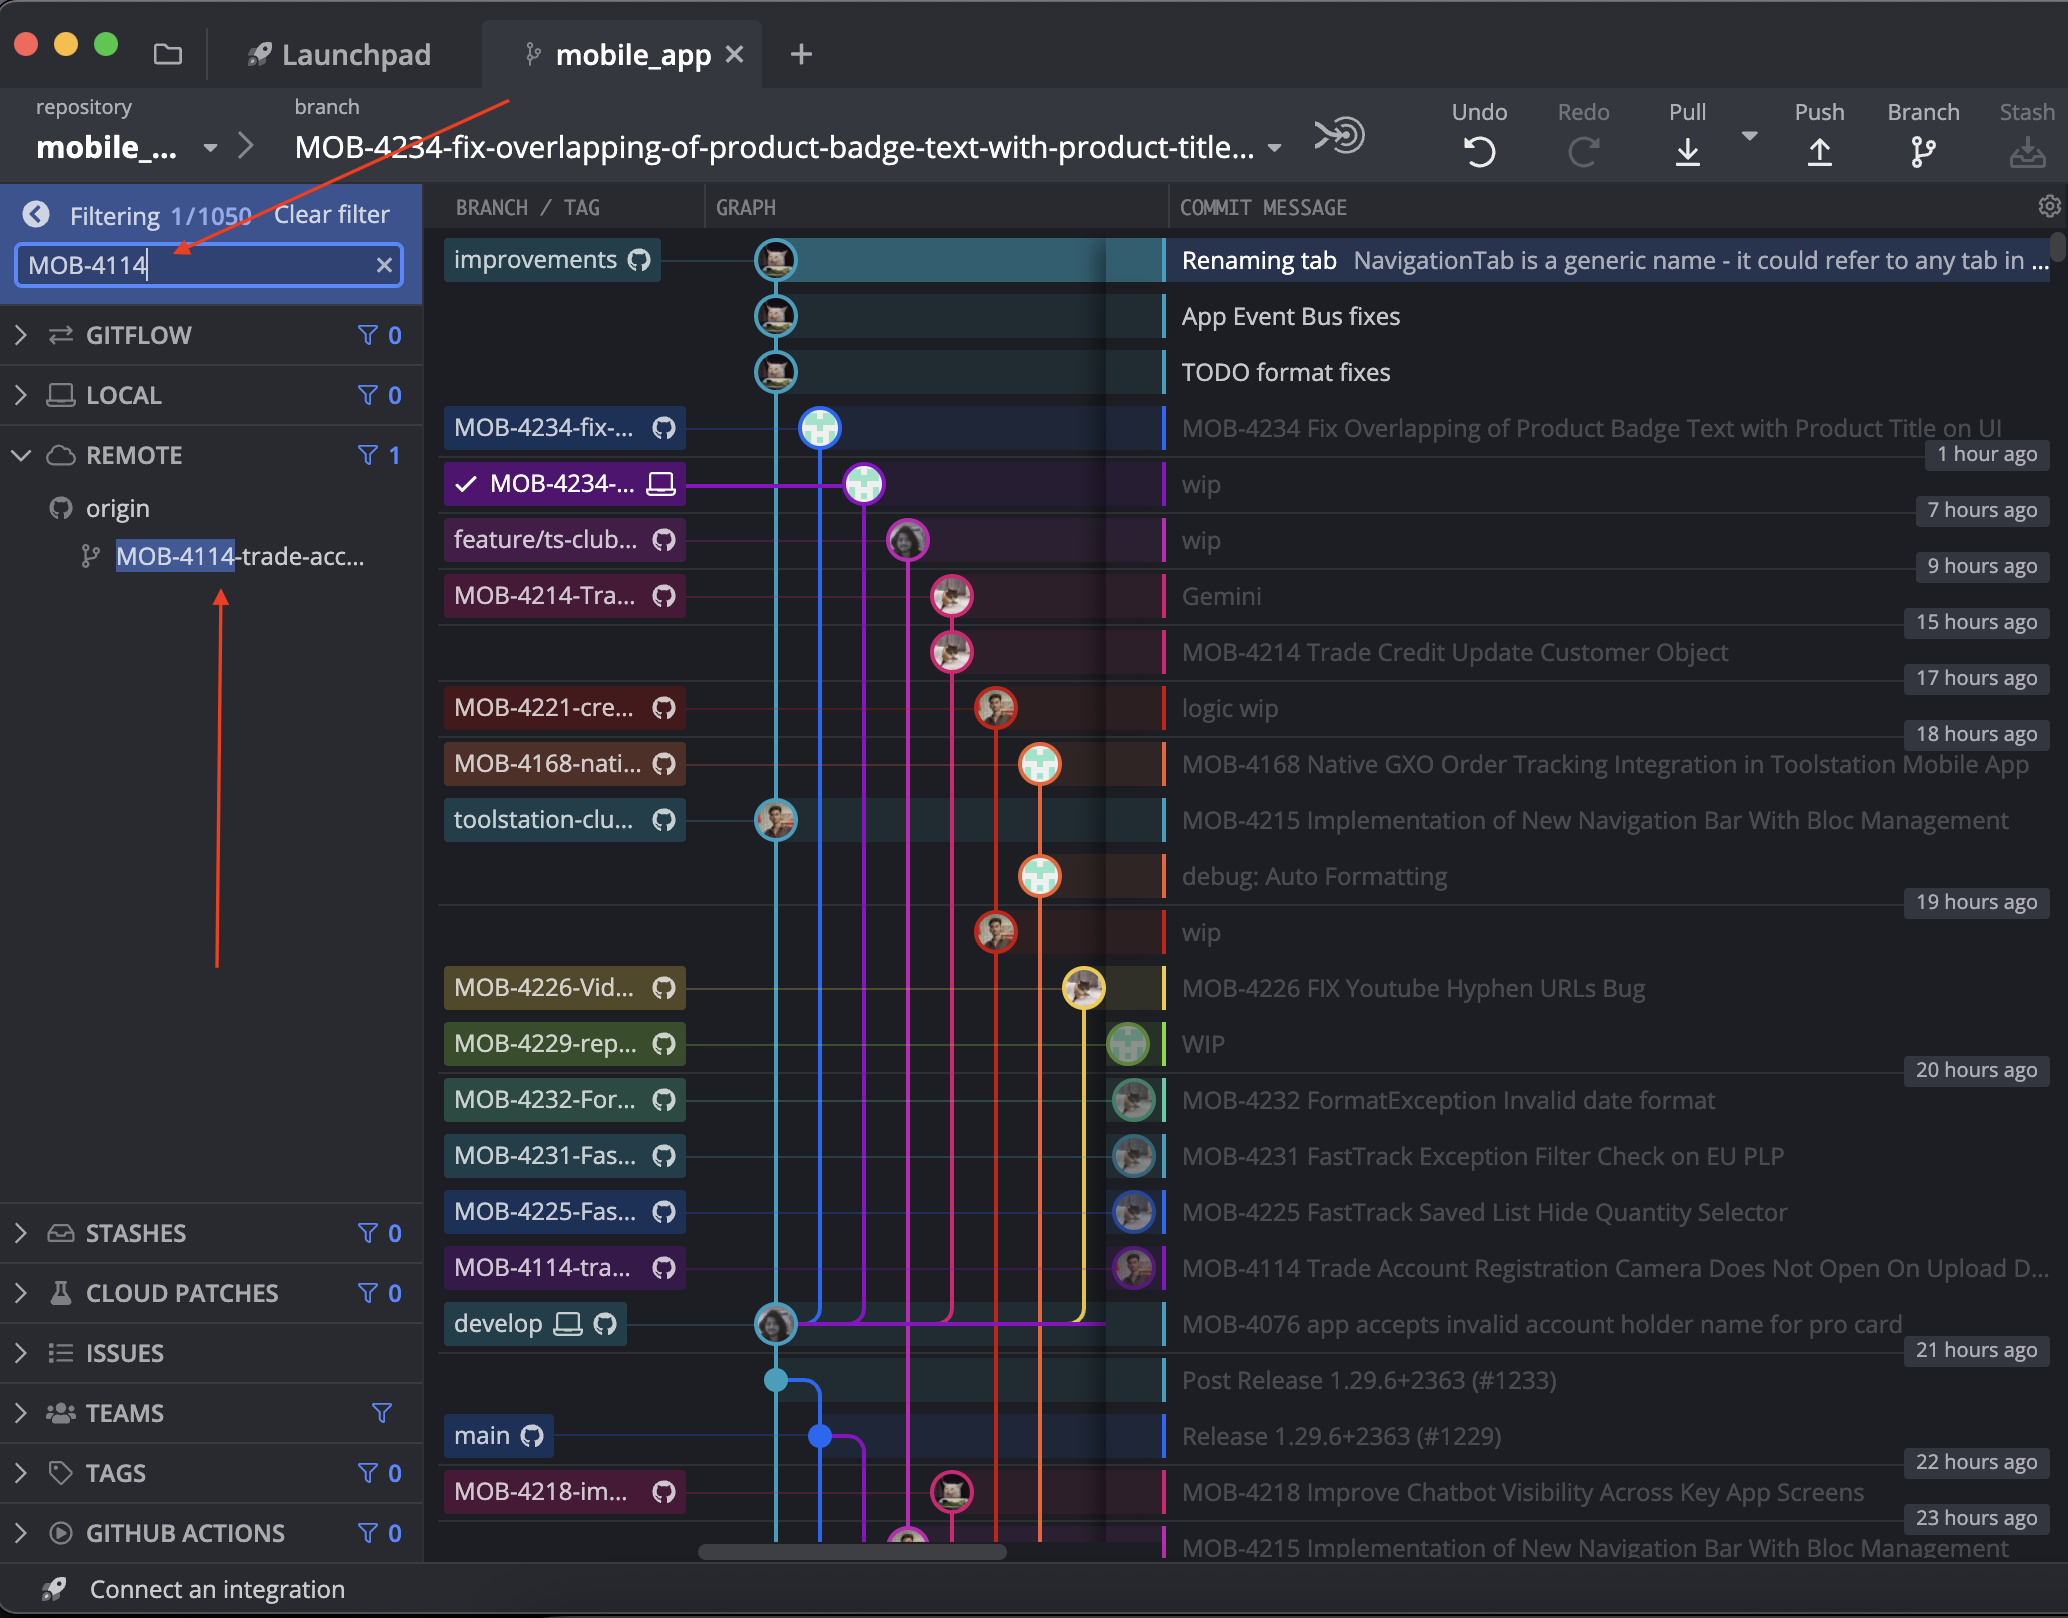
- Checkout to the ticket branch. The branch name will have ticket number as a prifix.
- Open
mobile-apprepository on VSCode IDE. - Connect the physical android/ios device with your system. You maybe prompted on your sytem or the decive about certain permissoin, allow all permissions.
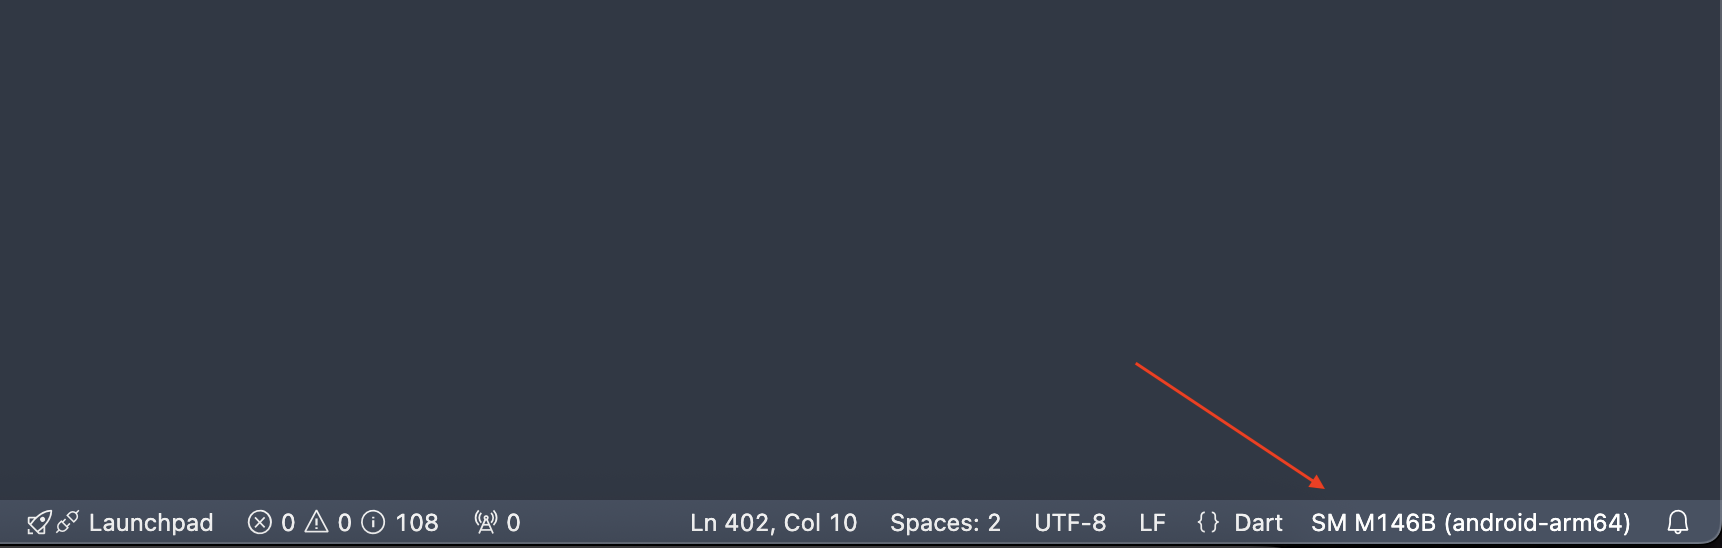
- Make sure, the name of the device on which you want to install the app is visible at the bottom-right corner of the IDE.
- If not, click on the device name that is visible on that corner.
- Now, select the device on which you want to execute the tests.
- Select the 'Run & Debug' button on the VSCode IDE.
- From the list, select the environment on which you need to test the ticket. The environment will be mentioned on the ticket. If not, reach out to the concerned developer of the ticket.
- Click on the play button and select the required region.
- Once installed, you can start the testing of the issue/feature. It will take few minutes for the app to install on your device.
Note: If you face any issues while building the app, execute this code in the terminal of the project. flutter clean && flutter pub get. If the issue still persists, reach out to the development team.
Post Testing Procedures
Once the testing of the app is concluded on the device. Stop the build execution by the pressing the stop button on VSCode IDE.
Now, follow the steps mentioned below to add a test result and conclude the testing for the ticket.
- Make sure to record your findings of the ticket issue/feature on the app while testing.
- Go to the Jira ticket and add a comment about your findings.
- Mention the following information on the ticket comment: Device in which the testing has been done (iOS/Android or both), Region, Environment(PROD/PREPROD), Build and version number.
- If there are any issue(s) found while testing, add those with description and reference videos.
- If no issues found and the fix/feature is working fine, add comment about the current behavior with a reference video.
- If the all the requirements of the ticket has been fulfilled and no issues were found, after adding a comment, change the ticket status to 'Ready to merge' and assignee to the Larsson/Chintan.
- If there are issue on the ticket, after adding a comment, change the ticket status to 'Fix' and assignee to the concerned developer.
At this point, the testing for the normal ticket has been concluded. If you have any confusion/concerns, kindly reach out to the seniors.