

Automation Setup Documentation
This document outlines the necessary steps to set up and configure the automation testing project for the Toolstation app.
This document outlines the necessary steps to set up and configure the automation testing project for the Toolstation app.
Requirements
- Android Studio: Setup and Configuration
- XCode: Installation and Setup
- Environment Variables: Setting Up Environments Variables (in zsh file for macOS)
- Node.js should be installed on your computer.
1. To install Node.js. Download the Node.js installer from nodejs.org
2. Once the installer is downloaded. Click on it and install Node.js.
3. After the installation is complete. Verify it by entering the command `node -v` on the terminal. It will display the version of the Node.js installed.
Automation Project Setup
Follow the steps mentioned below to setup automation testing project on your system
1. Clone the repository
Clone this repo: toolstation-testing-mobile on your system and checkout on the latest develop branch.
2. Install Dependencies
Open the project in VSCode and run command npm install in the terminal.
3. Run Test Application
Before configuring the automation script, go to toolstation mobile project: mobile-app. Make sure you are on the latest develop branch. Then execute the Test-prod app of any region. Once the application is running on the emulator/simulator device, stop the execution.
Kindly refer to this video of how to install test application on emulator/simulator devices.
4. Configure .env file
Follow the steps mentioned down below:
- Open the cloned
toolstation-testing-mobilerepository on VS Code IDE. - Make sure you are on the latest develop branch. Check it in the Gitkraken.
- Open
.envfile. - Add the path of mobile-app repository in the
MOBILE_APP_REPO_LOCATIONenvironment variable. Follow the steps mentioned in this video to the add path. - Add the app version and build number in
APP_VERSION_NUMBERandAPP_BUILD_NUMBERrespectively. You can get the app version and build number from thepubspec.yamlfile inmobile_appproject. The version object at the top will contain the app version and build number. - Add name and version of your android emulator in
ANDROID_DEVICE_NAMEandANDROID_VERSIONrespectively. To verify the name and version of your android emulator, refer to this video. - Similarly, add the name and version of your iOS simulator in
IOS_DEVICE_NAMEandIOS_VERSION. The name and iOS version were writen at the top of your simulator device. - For the last environment variable
DEFAULT_APP_IDENTIFIER, we only need to update this when we are executing any specific test case. We can leave this as it is for now.
5. Executing the Automation Script
Before running the automation Script, make sure the emulator/simulator device is open and there should be no device connected to the system view USB.
Follow the steps mentined down below to execute the automation scripts on the emulator/simulator device.
- Make sure the
.envfile is configured and the test prod aap has been build as mentioned in Install Build Steps section. - Make sure the emulator/simulator device is open and running.
- Delete the
allure-resultsdirectory if already present in toolstation. (Do not deleteallure-reportdirectory) - Click on the Run and Debug button in the VSCode IDE of
toolstation-testing-mobileproject.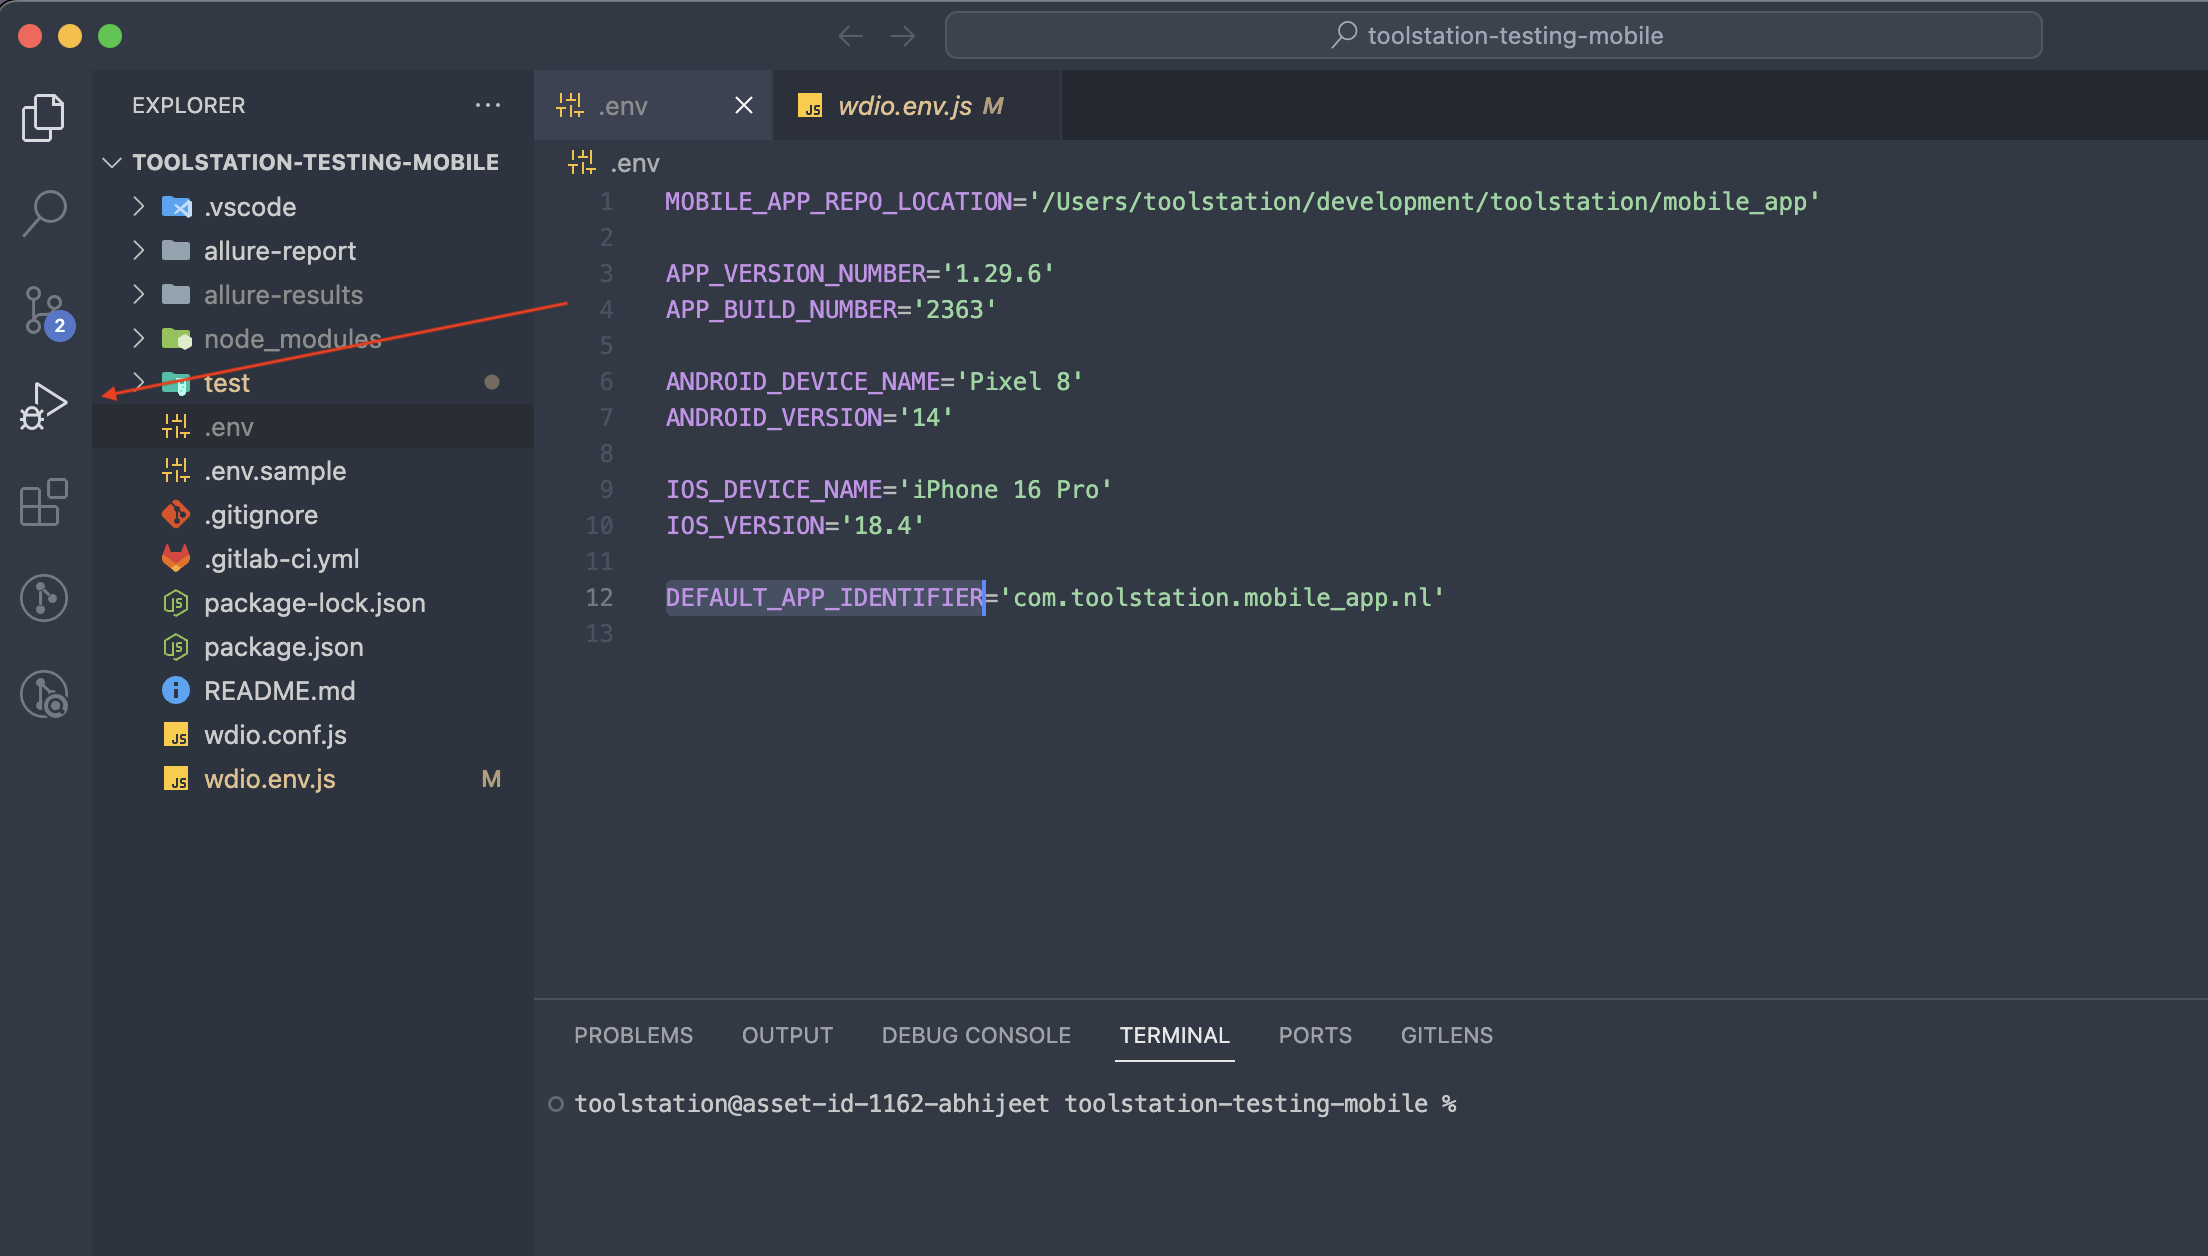
- Click on the button beside the play button to open the option menu and select Run all the tests.

- Click on the play button at the top-left corner of the IDE.
- Select the device in which you want to execute the tests (android/ios). Make sure the specific emulator/simulator device is opened before execution.
- Select the region for which you want to execute the tests (uk/be/nl). Make sure the test prod app has been build for the region before execution.
- Upon selecting the region, the smoke tests scriots will be executed and the logs will be visible on the console.
If you have confusion/concerns about the steps mentioned above, kindly refer to the video on how to execute smoke script for release.
We also have several commands to execute an automation script on specific devices and regions. Refer to the nomenclature for the command to execute the automation script.
npm run wdio [device] [region]
Examples:
The below command will execute the script on Android device for region UK
npm run wdio android uk
Similary, to execute the script on iOS for NL region, we should use:
npm run wdio ios nl
All these commands will execute all the writtent test cases in the automation scripts. To execute any single test case or group, refer to the steps given below.
How to execute single test case/group
To execute single, follow the steps mentioned below:
- Update the apk file name in
appium:appobject.- Open
wdio.env.jsfile. - In the constructor, locate
capabilitiesobject. - Now, update the apk file name on
appium:appobject. Add the name of the file for which you want to execute the test case.
Eg. If you want to execute some tests for BE region, then the value ofappium:appobject will beprocess.env.MOBILE_APP_REPO_LOCATION + '/build/app/outputs/flutter-apk/app-beprod-debug.apk'Note: Notice that only app-beprod-debug.apk changes, rest remain unchanged. We only need to update the apk file name for each region when executing single test cases.
- Open
- Refer to the list of apk files that you may need to update for each region.
- UK:
app-ukprod-debug.apk - BE:
app-beprod-debug.apk - NL:
app-nlprod-debug.apk
- UK:
- In the same capabilites object, there may be two capabilities, one for Android and the other for iOS. Refer to the screenshot given below:

We need to comment out the one which we don't want to execute. At a time, execute the script on any single device.Note: We only need to update the apk file name on Android capabilites. For iOS, we don't need to update the app file name as for all regions, there is only one file on iOS: Runner.app.
- Open
.envfile and update objectDEFAULT_APP_IDENTIFIERwith the app_id for the region that you want to execute the scripts. Refer to the list below for the app_ids of each region and device.
For Android:- UK:
com.toolstation.mobile_app - BE:
com.toolstation.mobile_app.be - NL:
com.toolstation.mobile_app.nl
For iOS:- UK:
com.toolstation.mobile-app - BE:
com.toolstation.mobile-app.be - NL:
com.toolstation.mobile-app.nl
- UK:
- Once the above steps are completed, use the 'Run & Debug' option or the 'mocha commands' to execute specific test cases on emulator/simulator devices.
Execute scripts using 'Run & Debug' option- Click on 'Run & Debug' option from the left menu on VSCode IDE.
- Beside the play button on the top-left panel, click on the options.
- Select, 'Run specific test' option.
- Click on the play button.
- Enter test case id, group id or page id to execute the test scripts.
Execute scripts using 'mocha commands' 6. Open terminal on VSCode IDE. 7. Use the mocha command given below to execute test scriptshell npx wdio --mochaOpts.grep [test case id/ group id/ page id]Eg:shell npx wdio --mochaOpts.grep SI_1_1.2 // Will only execute test case with id 'SI_1_1.2'
6. Common Issues & Solutions
- Issues during first execution:
On executing the script for the first time, there might be few issues encountered on the console. Follow the steps given below to solve the issues:- ECONNREFUSED 127.0.0.1:4723:
To solve this error, execute command:killall -KILL node // For MacOStaskkill /F /IM node.exe // For Windows
After the above command is executed, run the automation script again and check. - Issues while installing the app on physical/emulator/simutor device:
While installing the builds, if you face any issues or the installation failed and you see an error message on the debug console of your IDE, execute the command given below on the terminal ofmobile_appproject.flutter clean && flutter pub get - Issues while installing the app on iOS device:
If the iOS app is not installing and you see error messages on the debug console, follow the steps given below:- Open the
mobile_appproject on VS Code IDE. - Locate
Podfile.lockfile in ios directory. - Delete
Podfile.lockfile. - Open the terminal, on the IDE.
- Now, go to ios directory using this command:
cd ios. - Execute this command:
pod install. - This will create a new
Podfile.lockfile with all the required dependencies.
- Open the
If you face further issues regarding installing the app on any device, kindly reach out the flutter team for solutions.
If you face further issues regarding the setup and execution, kindly refer to this documentation for common issue and solutions.