

Payment And Order
High Street Lockers
1. Summary
This document outlines the complete requirements and workflow for implementing a eLocker Click & Collect solution across three Toolstation High Street format stores in London.
The objective is to provide customers with a 24/7 secure collection option, improving convenience and operational efficiency.
2. User Journeys & Workflows
2.1 Work Flow
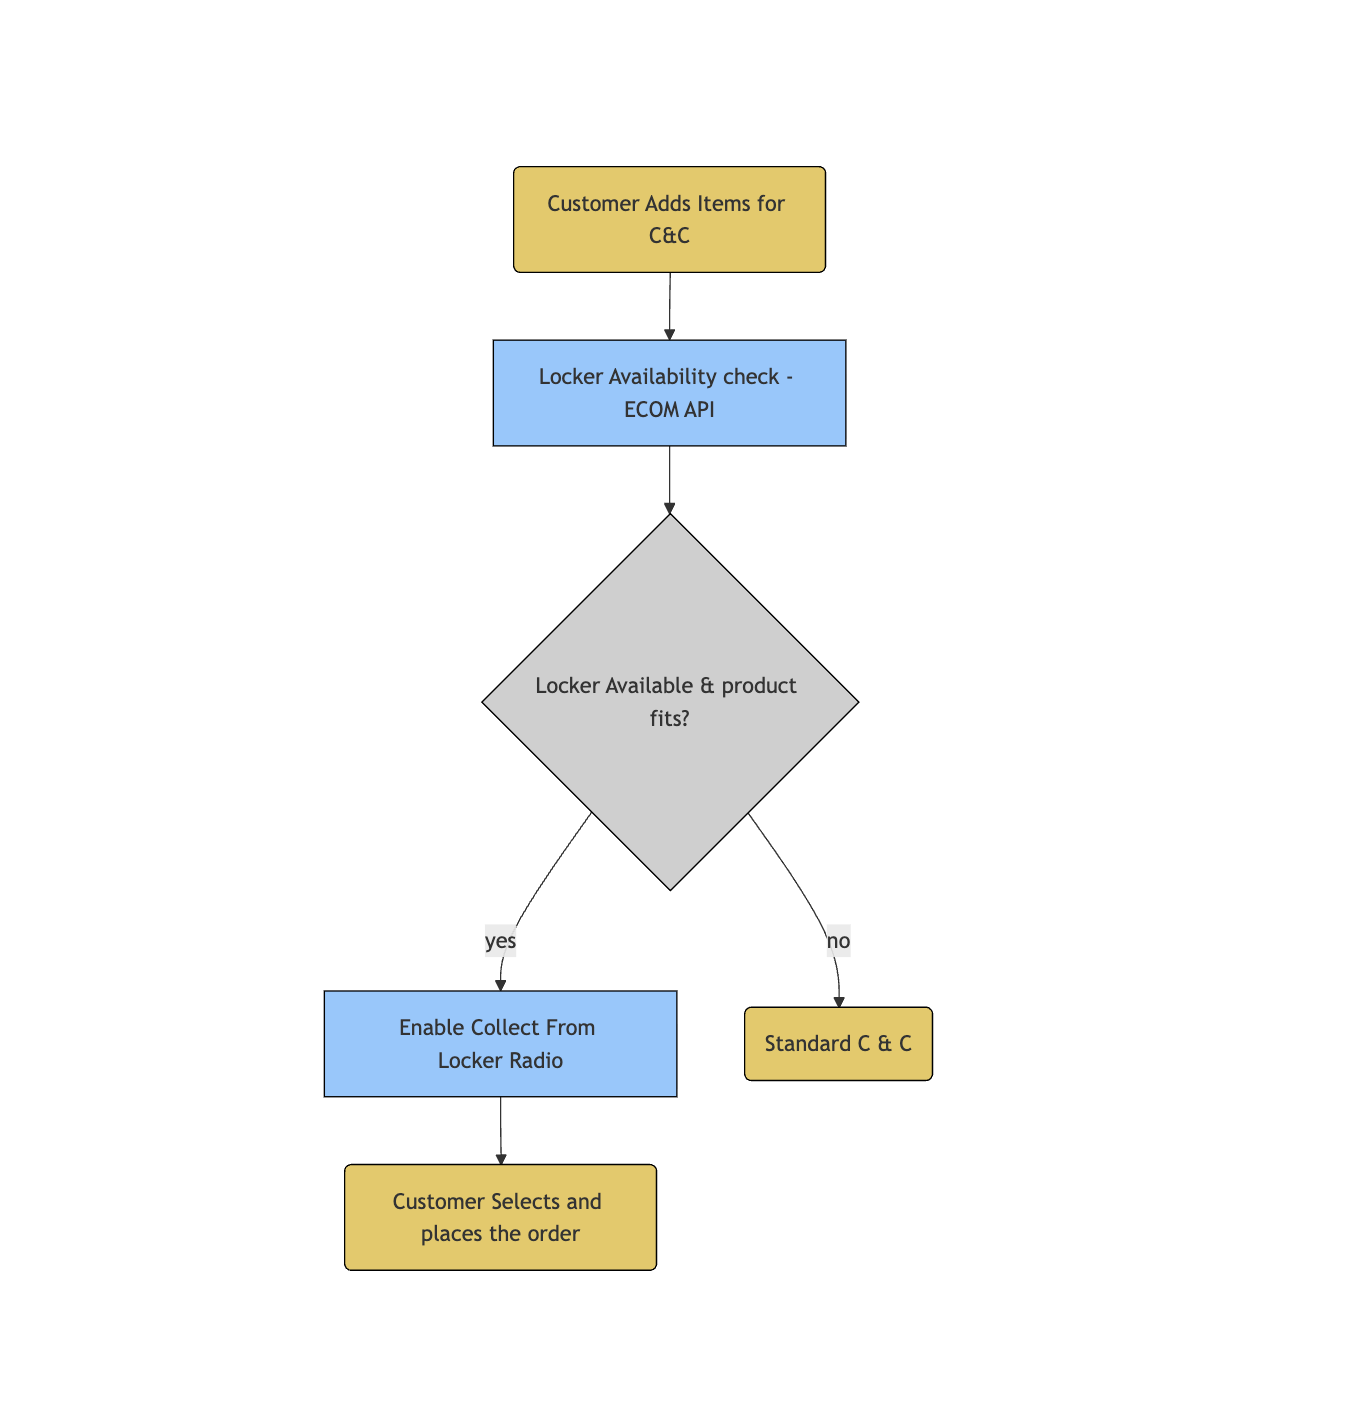
Mermaid Code
flowchart TD
    A(Customer Adds Items for C&C)
    B[Locker Availability check - ECOM API]
    C{Locker Available & product fits?}
    D[Enable Collect From Locker Radio]
    E(Standard C & C)
    F(Customer Selects and places the order)

    A --> B
    B --> C
    C -->|yes| D
    C -->|no| E
    D --> F

    %% Colors
    style A fill:#e8c85c,stroke:#000,stroke-width:1px
    style B fill:#8cc8ff,stroke:#000,stroke-width:1px
    style C fill:#cfcfcf,stroke:#000,stroke-width:1px
    style D fill:#8cc8ff,stroke:#000,stroke-width:1px
    style E fill:#e8c85c,stroke:#000,stroke-width:1px
    style F fill:#e8c85c,stroke:#000,stroke-width:1px
2.2 Customer & Staff Journey
Phase 1: Customer Order Placement
- Add to Trolley – Customer adds products for collection in the app Trolley.
- Check Availability – Frontend triggers the
check_locker_availabilityECOM API. - System Validation is done by backend, it ensures:
- Selected store supports locker collection.
- No age-restricted products.
- All items have volumetric data.
- A suitable locker size is available.
- Select Locker – A new radio button “Collect from Locker” appears if validation passes.
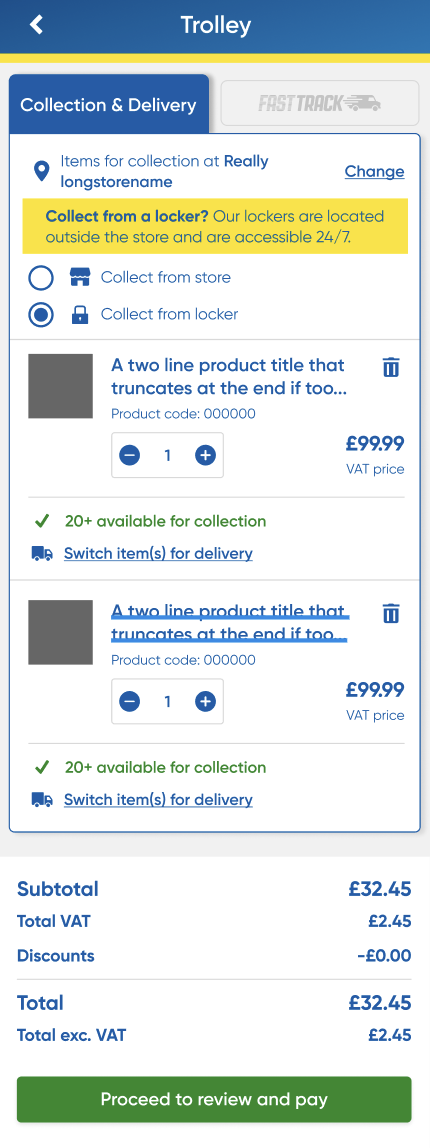
- Place Order – Order sent with
locker_collection_requested=true.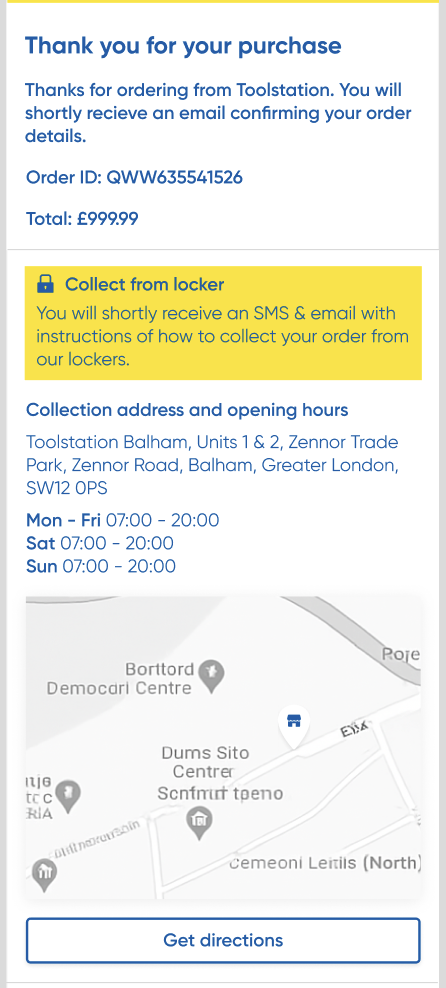
Phase 2: Order Processing & Fulfilment
- Processing
- Order Enters EPOS Queue – Order appears in the Click & Collect queue.
- Pick Order – Store staff collects the required items.
- Locker Allocation (3rd-Party System)
- Log In to eLocker Portal – Staff access the external locker management system.
- Assign Locker – Staff search by order number and assign an available locker.
- Locker Auto-Opens – The eLocker system remotely unlocks the assigned locker.
- In-Store Fulfilment
- Load & Close Locker – Staff place the picked items into the open locker and close it.
- Mark as Ready in EPOS – Staff update the order status to “Ready to Collect” in EPOS.
Phase 3: Customer Notification
- Toolstation sends standard Ready to Collect notices.
- eLocker sends a secure collection link to the customer.
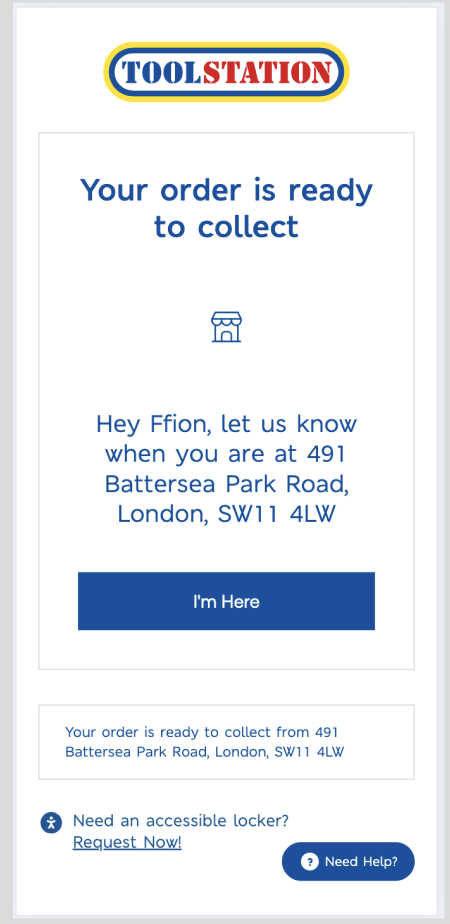
Phase 4: Customer Collection
- Customer arrives at the locker.
- Opens secure eLocker link.
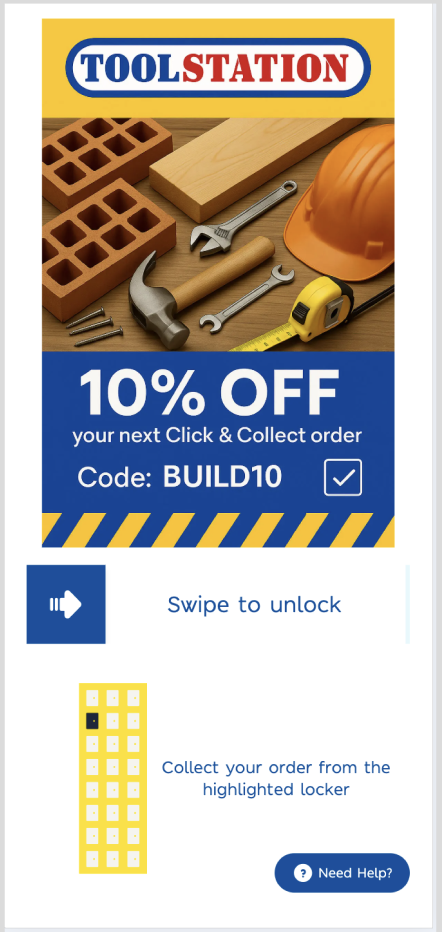
- Confirms presence at locker.
- Locker opens automatically.
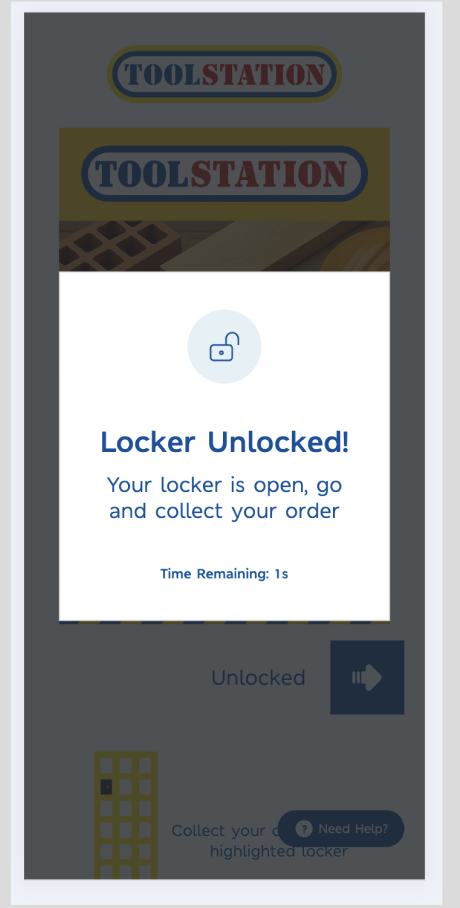
- Customer retrieves the order.
- eLocker logs the collection.